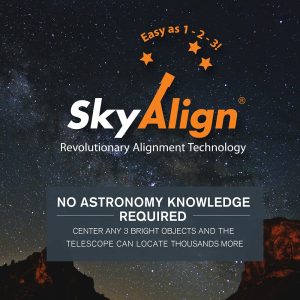
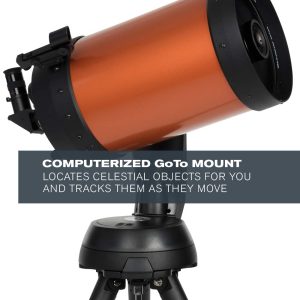
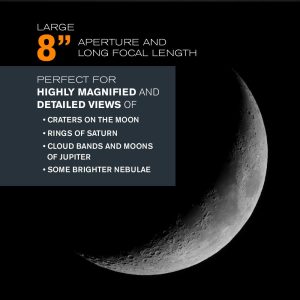
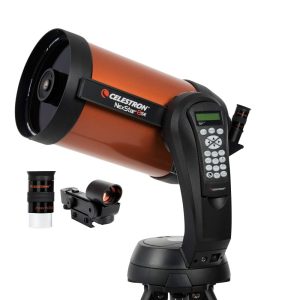
The best telescope is the one used often to enjoy the beauty and intrigue of the night sky. For those searching for telescopes for astronomy beginners that are infused with the latest computer technology, Celestron’s NexStar 8SE Schmidt-Cassegrain Telescope fits the bill perfectly. The NexStar 8SE Computerized Telescope features Celestron’s iconic “orange tube” design and updated technology with the latest features for amazing stargazing for beginners and experienced observers. Celestron’s signature telescope combines advanced features and excellent optics in one easy-to-use system, the NexStar 8SE. It’s the perfect choice for your first serious telescope, offering striking views at an economical price. The eight-inch primary mirror in this computerized telescope packs enough light-gathering ability to observe the best that our Solar System has to offer, from Saturn’s rings to the cloud bands on Jupiter and geographic features on the surface of the Moon. When it comes to deep sky objects, take your 8SE to a dark-sky site and you’ll see hundreds of pinpoint stars in the Hercules Globular Cluster, the spiral arms of the Whirlpool Galaxy, and more. Featuring a database of more than 40,000 celestial objects, the 8SE’s GoTo mount automatically locates and tracks objects for you. You can also take a Sky Tour and let your telescope show you the best objects currently visible. The single fork arm design and sturdy steel tripod all assemble and break down from separate components for easy transportation. SkyAlign technology gets your telescope aligned and ready to observe in minutes. Even if you’re unfamiliar with the night sky, you can easily align your telescope on any 3 bright objects. The NexStar 8SE is a telescope that will grow with you as you advance in the hobby of astronomy. It’s compatible with all the high-tech accessories advanced users love. Provide GPS coordinates to your telescope with SkySync, or add automatic alignment functionality with StarSense AutoAlign. Buy with confidence from the world’s #1 telescope brand, based in California since 1960. You’ll also receive a two-year warranty and unlimited access to technical support from our team of US-based experts.
Nexstar 8 SE telescope combines excellent optics and computerized “GoTo” tracking in a package that’s light, portable and affordable. The legendary performance of Celestron’s orange tube C8 telescope has been updated with high performance Starbright XLT coatings, and the single arm Nexstar mount now includes Celestron’s easy to use “SkyAlign” technology.
The Nexstar 8 SE upholds Celestron’s reputation for quality optics. When I use an 11mm Plossl eyepiece (almost 200x magnification) for example, I can easily see the Cassini Division in Saturn’s rings. When I look at Jupiter, the pale orange color of Jupiter’s famous Great Red Spot is visible, and I’ve even been able to identify the polar caps and spot dust storms on the planet Mars. A 20mm Plossl eyepiece (about 100x magnification) is a good choice for viewing galaxies and star clusters. When I look at globular cluster M13 in the constellation Hercules the high contrast XLT optics show me a glowing snowflake made of hundreds of tiny pin-point stars! And a low power 32mm Plossl eyepiece is a good choice for views of larger deep space highlights like the Andromeda Galaxy and the Orion Nebula.
Celestron’s patented “SkyAlign” system makes the Nexstar 8 SE very easy to use. I just pick the nearest town from the built-in list, enter the date and time, and point the telescope at three bright stars. I don’t need a star chart because “SkyAlign” identifies the stars for me. When I just want a quick look at the moon or a planet, I like to use the “Solar System Align” option. After entering the date and time, I just point the telescope at the moon and press the “Align” key. That’s all it takes, the computer takes over and the telescope begins tracking quietly and accurately. At star parties I often have my Nexstar up and running while older computerized telescopes are still waiting for their alignment stars to appear in the twilight.
The Nexstar 8 SE comes with a simple red-dot finder scope and a basic 25mm eyepiece. You’ll want to add a few good eyepieces to take full advantage of the Nexstar 8 SE’s excellent optics. At the very least get Celestron’s bargain priced Accessory Kit which includes high and low power plossl eyepieces, or treat yourself to some top rated Tele Vue eyepieces. At twenty-four pounds total weight, the Nexstar 8 SE is unusually light and portable for an eight-inch telescope. The drawback of course is that some people will find it too light. Like other Schmidt Cassegrain (SCT) telescopes there are plenty of optional accessories to upgrade this telescope with, such as heavy duty tripods and an optical finder scope. If you want to try astro-photography, however, check out Celestron’s CPC 800 Telescope which features a heavy duty mount and tripod and an 8×50 optical finder scope right out of the box. —Jeff Phillips
Pros:
- Excellent optics
- Easy computerized GoTo tracking
- Light, portable and affordable
Cons:
- Plastic accessories
- Short battery life
- Too light for astro-photography
From the Manufacturer
Manufacturer Description
The largest of the NexStar SE family with 78% more light gathering than a 6-inch model, the NexStar 8 SE will enable you to see deep into the Universe. The distinctive patented fork arm with ergonomically designed integrated hand control cradle gives solid support to Celestron’s classic 8-inch optics. The NexStar 8 SE features Schmidt-Cassegrain 8-inch aperture optics with our premium StarBright XLT coatings and a powerful 2,032mm focal length and f10 focal ratio.
About the NexStar SE Series:
NexStar 8 SE Features:
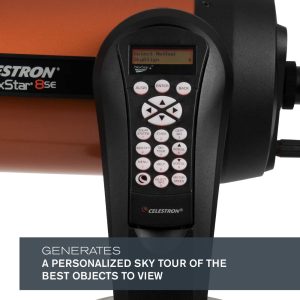
The NexStar 8 SE has all the same features as Celestron’s most advanced computerized GoTo telescopes, including our revolutionary SkyAlign alignment technology, a sky tour feature, a database of over 40,000 celestial objects, and easy-to-use hand control.
Plug the optional CN-16 GPS accessory into NexStar’s auxiliary port and download data from orbiting GPS satellites for truly quick and easy alignments. The universe may be full of mysteries, but using the NexStar 8 SE isn’t one of them.
In the tradition of Celestron’s famous orange optical tubes, the NexStar SE Family combines the classic heritage of the original orange tube telescopes with state-of-the-art features including a fully computerized operating system, flash upgradeable hand control, our superior StarBright XLT coatings, our revolutionary SkyAlign telescope alignment software, and much more.
Whether you are a seasoned astronomer looking for a portable scope with advanced features, or just starting your astronomy adventure and looking for an easy way to enjoy the night sky, a NexStar SE will help you take a closer look.
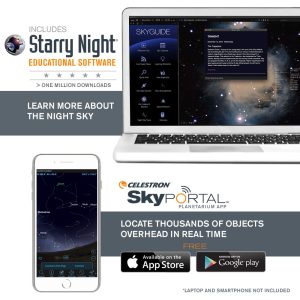
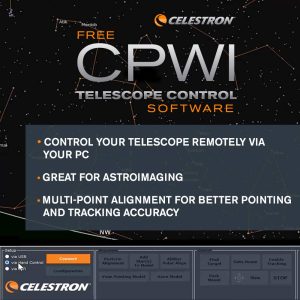
Every NexStar SE includes a version of The Sky software Level 1 Planetarium software for exploring the Universe on your PC and printing out custom star charts of the sky. In addition, you receive our NexRemote software that allows you to operate your telescope via your PC. This software package, valued at over $100, is included free with your NexStar SE!
General Features:
- 8-inch Schmidt-Cassegrain telescope
- SE combines the classic heritage of the original orange tube telescopes with the latest state-of-the-art features
- StarBright XLT high transmission coatings come standard
- Quick release fork arm mount, optical tube, and accessory tray for no-tool setup
- Celestron’s unique patented single fork arm with integral hand control design provides a rigid and smooth operating structure for the optical tube
- StarPointer finderscope to help with alignment and accurately locating objects
- Sturdy computerized altazimuth mount
- Ultra sturdy steel tripod with accessory tray
- Star diagonal provides more comfortable viewing position when observing objects that are high in the sky
Computerized Features:
- Proven NexStar computer control technology
- 40,000 object database with 200 user-definable objects and expanded information on over 200 objects
- SkyAlign allows you to align on any three bright celestial objects, making for a fast and easy alignment process
- Flash upgradeable hand control software and motor control units for downloading product updates over the Internet
- Custom database lists of all the most famous deep-sky objects by name and catalog number; the most beautiful double, triple, and quadruple stars; variable star; solar systems; objects and asterisms
- DC Servo motors with encoders on both axes
- Autoguider port for long exposure astrophotography
- Double line, 16-character liquid crystal display hand control with backlit LED buttons for easy operation of go-to features
- NexRemote telescope control software and RS-232 cable included for advanced control of your telescope via computer
- GPS-compatible with optional CN16 GPS accessory (93963)


 Celestron – NexStar 8SE ...


Sheldon Sims –
I recently upgraded to the Celestron Nexstar 8 SE. I had the Nexstar 4 GT before it. I have to say that the Nexstar line has come a long way in 4 years. The hand controller now has a larger database of objects that the scope will go to, and more alignment methods have been added. With SkyAlign, you can have the scope aligned in no time. I also like the fact that the hand controller and motor controllers are firmware upgradable now. This scope’s go-to capabilities are fantastic. Once I used SkyAlign to set it up, I was finding nebulas and galaxies that I had never seen before. 8 “AA” batteries do not last long in this scope, so if you plan to use it for hours at a time, I would suggest that you purchase the AC Adapter, Car Adapter, or Power Tank to go with it. Anyway, the Nexstar 8 SE is a super scope. I love it!
Lenny H. –
When I opened the package I was surprised the quality of the product. I went right away to test it in my first night. Due to Florida’s terrible rainy days lately it was mostly cloudy yet I was able to see Mars, Saturn’s rings, Jupiter’s moon and clouds, even behind a tinted glass! That’s how high quality these optics are. Able to gather celestial light even with such terrible viewing conditions. The eyepiece that came with it(25mm)is of very good quality itself, I bought a an eyepiece set but I still find myself using it a lot. The tracking does drain batteries fast so I had no choice than to upgrade to an AC power supply. Due to high humidity, dew was a problem on the optics, had to buy a dew shield.To summarize, every penny spent on it was well worth it. This really isn’t an entry level telescope so it does cost a lot but it also shows on the quality and what you can see through it.I definitely recommend buying this telescope if you are serious about astronomy or want a real good telescope.It’s no wonder this is the most popular telescope these days.~Leonel & Lennier11/18/2010Just an update on the reliability of this product (mount/optics) for anyone interested on its longevity. After 2 years of use it still works as great as the first time. No fail electronics or jammed magnifier. Works perfectly; thus in our opinion it was a great investment.
D –
I received this telescope as a gift for Christmas. My husband did much research and purchased the telescope as well as ac/dc and portable power supply.I was very fortunate that he purchased those external sources of power as the power source using the batteries is faulty. Loaded up 8 brand new batteries and turned on the scope: NOTHING. Thought perhaps they were loaded wrong, removed them and reinserted the batteries. Still nothing. Tried another set of brand new batteries. Still NOTHING.I have been able to use the scope, it works well on external power, however if the power supply comes loose for even a second, I have to re-align the scope because the battery power supply seem disconnected from the scope. I have tried to call Celestron however, they are on vacation until 1/4/2009. Wonderful. I really don’t want to send the scope back for this (which they would cover under warranty I am sure–except they won’t pay for shipping).Very disappointed with this as the scope was pricy.E-mailed Celestron and received reply after everyone returned from vacation. I will have to return the base to the to have it evaluated.
A&J –
I’ve used this telescope since June 2009. The NexStar 8 SE provides pretty good views, but the computerized mount is literally a piece of junk. I’ll tell you why.Problems with the mount:1. Battery compartment: Lots of space taken up for batteries, but batteries only work for a few minutes. This thing eats batteries, and doesn’t come with a power cord! Further, the battery compartment design is poor, with two battery holders dangling by their wires. The battery holders must be placed a certain way after batteries are installed into them. There’s only one way to place the battery holders and still be able to close the compartment cover, but there are a few ways to place the battery holders incorrectly. If you want to be able to close the battery compartment, you’ll probably have to look up the instructions on the internet. You’ll need to by the optional AC power cord (which is what I did since I’m always observing within an extension cord’s length of an electrical outlet), or the 12V cord along with a 12V battery in order to use this scope.2. Noise: I know everything seems louder at night… in the dark… when you’re supposed to be quiet. But slewing at moderate to fast speed with this thing is like a freight train coming down the tracks. It’s not a problem if you’re not near anyone, but the many times I’ve been in my backyard or up at the lake with this scope, I’ve worried about disturbing neighbors.3. No clutch in azimuth: This means you can’t move the mount in a sideways direction without using the power-hungry, fantastically noisy motor. You can move the mount in altitude manually, but not in azimuth. Truly a bummer.4. Spur gears: There’s a lot of slop in the gears, so when you begin to slew the scope it often doesn’t actually begin to move for a short period of time. No big deal, but it’s annoying.5. Time isn’t saved: As others have mentioned, having to enter the time each time you turn on the mount is just ridiculous.6. Cheap hand controller: The screen on my hand controller came loose and tilted within a couple of weeks of use. LCD screen doesn’t work well in cold weather. I know this is a common problem with these types of controllers, but cold weather is a common condition for astronomical observing. Celestron and all other manufacturers really should take this into account and install a heating element in the controller. (I know all the workarounds – use handwarmers, put the controller in your jacket, attach your own heating element, etc. – but they’re just not convenient.) There’s obviously no intention of minimizing power consumption with this mount, so adding a heating element wouldn’t be a big deal.7. Built-in bubble level: There isn’t one.8. Defective (at least mine is): I’m in the process of sending my mount to Celestron for warranty repairs because it no longer slews properly at slew speeds slower than 8 or 9 during alignment. So, at a slew speed of 5 which is the default for alignment, the mount doesn’t move at all. It’s too bad I have to pay for sending it in, when I’d really rather just get a better mount.Problems with the tube:1. Focus knob: The focus knob shakes and moves the mirror way too much. If I didn’t know better I’d think it was a defect. But I know better. It’s not considered a defect. It’s just a bad design that amateur astronomers apparently don’t mind too much.2. Accessory mounting holes: Ideally, you’d have a red-dot finder and 9×50 finderscope mounted to the top of the tube. You can’t do that with this scope unless you’re willing to get out your drill. There are mounting holes at approximately the 2 o’clock position and 4 o’clock position, so most people will probably use those using the topmost holes for the red-dot finder and the lower ones for the magnified finderscope. There should be another set of holes on the top of the tube somewhere between 10 and 2 for the purpose of mounting accessories.There are a few things I like about the scope:1. Portable: Compared to my 10″ dob, the 8 SE is quite portable, and this is the primary reason I bought it. I’ve been able to take it to the lake (where the sky is much darker) on many occasions.2. Tracking: Once aligned the mount tracks pretty well. I’ve left the scope tracking for over an hour, to find that the object of interest was still in the field of view when I returned.For me, the bottom line is that the NexStar 8 SE has too many problems, and shouldn’t be considered by anyone new to astronomy. Considering the design quality, the 8 SE is overpriced. You can get a bigger and better telescope for less than half the price if you’re willing to give up the computerized object locator and the tracking ability that’s inherent in such a mount. Trust me. If you’re a beginner in reasonably dark skies (meaning you can actually see and locate stars with just your eyes) then a computerized mount like this one will frustrate you far more than it will help you.
Derrick Dunn –
In short, for the money, this scope is great. You can spend twice the money for the capability this scope offers. This scope is easy to setup (probably 20 min. from pulling it out of the box). The built in alignment program is not perfect, but you can tweak it easily and be viewing in no time. I have not tried using the scope on batteries, just the AC adapter, based on other reviews. The built in computer data base is extensive and can give you hours of enjoyment. The “TOUR” button will keep you busy! I have looked at Mars and Saturn. You can see the polar cap on Mars (barely) and I have seen at least three of Saturn’s moons. Views of the moon are spectacular. Viewing deep space objects are not quite as captivating due to my slightly light-polluted sky.The packaging the scope comes in is excellent! It is nested to allow maximum protection. I have had to e-mail Celestron once for help (AC power supply was loose). They quickly responded, and their fix worked. I highly recommend the AC adapter, anti-vibration pads, and the 1.25″ “ZOOM” eyepiece as “needed” accessories. ENJOY and clear skies.
Rich –
Not sure if I should be reviewing it this soon, as there is definitely a learning curve involved. But, after a few sessions of stargazing, I believe the computer speed is about half of optimum. Either that, or a bigger text display is in order. I’m left waiting for the alignment message to be displayed, and waiting, and waiting. The tube optics are good, however the eyepiece FOV is limited. I replaced the eyepiece with one with a wider FOV and was able to align much easier. A Telrad will likely help the alignment, too. After all that, I still would recommend it and would buy it again if I had it to do over.
a gadget lover –
The setup is simple. Some negative reviews were mostly from failed Sky Align procedure which I think is due to not doing it correctly. For me, I got it work right out the box:1. Assemble the hand control on a fully extended Tripod. I put it on my backyard grass and make sure it leveled ( I didn’t even use the level bubble as my grass is rather even). then assemble the tube.2. Enter the location. I use the GPS coordinates from my Smartphone. enter the date,time. Make sure you enter new date, time every time you bring the scope out as it doesn’t have an internal clock (it only remembers the last saved Date and time that you used the scope). It does remember the location so no need to re-enter this.3. I choose SkyAlign (3 star Method) and don’t have any problem with it. Make sure you choose 3 bright stars (or planets) as far apart as possible and not all from a region of the sky. For example, 3 stars from the winter triangle are too close. I think this is a common mistake that leads to Failed Alignment. Then you’re ready to go. Select an object and press Enter, the motorized scope moves the object. It may not be centered in the eyepiece but in the view. Use the directional buttons (change to middle slew rate about 5 0r 6) to center it. the Scope will continue to track the object and keep it centered.I’ve been watching the sky for a while with a 90mm Maksutov-Cassegrain on a Manfrotto tripod. Even though I know the sky well enough to direct my scope correctly to sky objects (Jupiter, Saturn, etc), tracking a planet (Jupiter for example) by manually re-positioning the tripod is a pain because Jupiter goes out of view every 10-15 seconds (because the Earth turns) on hi power view. So this Nexstar is awesome that its motor keeps tracking the object automatically to keep the object centered in the eyepiece. And it tracks very well. One time I went inside the house for 20-30 minutes and came back to see that the object is still exactly centered in the eyepiece. The tracking rate is really accurately in sync with earth rotation rate.I have had it for a few days, have seen Jupiter, saturn, mars, venus, several nebulas, galaxies, star clusters. I have also a 12.5mm eyepiece and 2x Barlow to reach a magnification of (2000/12.5)x2=320. 300x is usually the sky limit even though an 8 inch scope has a theoretical limit of 8x(50 to 60)=400x to 480x.In summary, a great telescope. Motorized scope is quite useful even if you know the sky well, at least for the automatic tracking of an object as stated above.
Kindle Customer –
When I received this scope and unboxed it I was very excited until I opened the box containing the optical tube. After taking the tube out and looking into the big corrector plate, I was shocked to see a smudgy deposit on the glass. Even worse, it was on the inside of the corrector plate. I wasn’t sure if it would negatively affect the performance of the assembly so I took it outside to test it out. Views were good, but it bothered me that I couldn’t clean that stuff off the corrector plate. I considered removing the piece to clean it but decided not to as it was brand new, warrantied and I assumed that if I didn’t reassemble it in a precise orientation then I would end up having to collimate it. I called Celestron customer service which was a rather lousy experience. After explaining my concern over the dirty optics, she proceeded to read to me straight from the Celestron website’s FAQ pertaining to my problem. I know this because I later checked Celestron’s site and found the very same article. She recited it verbatim. She tried downplaying the issue as though the optics not being clean had little effect on viewing quality. I told her that for a thousand dollar telescope I would expect the optics to be clean, certainly not to have smudging on the inside of the glass. Eventually I was told to email a picture of the dirty glass for evaluation by a tech to determine if it would require cleaning or replacement. I found a telescope dealer not too far away that offers cleaning and collimation and I will likely take it there to avoid dealing with Celestron any further. Unfortunately it will cost me about $150 dollars for their service. I was overwhelmingly happy with my first Celestron scope but after this I think that I will no longer give them my business. As far as the scope goes, it is probably awesome but I can’t say with absolute certainty until I get it cleaned up. The views while dirty were quite nice and fairly stable despite the single fork. The tripod is solid although the little adhesive bubble level is kind of cheesy. Highly recommend the scope, just be aware that Celestron’s cusomer service is lackluster.
James A. Billings –
I’ve been using my Celestron 8SE to see the Moon, Jupiter, and several Messier objects. The views have been outstanding and much clearer than I expected. Details on the moon were fantastic and it wouldn’t have taken much for me to swear I could see some of the stuff left by the astronauts. I didn’t see any (I think) but I was close. Jupiter and the moons were clear as a photograph and, while I was observing over a period of a couple of hours, I saw two of the moons move. Also, while I was observing, I saw an Earth sattellite move across the field of view. I used the manual control to track the satellite for a while but could see no detail – just a speck of light I was unable to see with my naked eyes. What a coincidence! A concern about the scope is that battery drain is from 200 milliamps to 400 or so milliamps during tracking. That’s a lot for an AA battery. I would suggest making or purchasing an external 12 volt power source to plug into the scope rather than use internal batteries during an extended observing session. I purchased the accessory kit for the scope. Very impressive for the price. I recommend it, too. The Crab nebula was not as impressive as the Orion nebula, but both show awesome detail. I’m still looking for Uranus and Neptune.
Shopper 38580951900 –
First off, there is nothing easy about using the Celestron Nextar 8. It’s complex, frustrating, and fails to deliver on Celestron’s marketing promises.For example, the hand controller functions like it was designed and built in 1988. It has a cheap LED display and tedious, needlessly complex & un-intuitive menu operations. One must endure a labyrinth of menus just to set it up. Inconceivably, the controller loses its time setting every time you shut it off. That’s just amazingly poor design.They do occasionally update the goto controller firmware, but pray that you don’t have to ever do this. Celestron’s process is out of the stone age. It requires an antiquated RS-232 cable (think 1970’s and 80s cables) to update its firmware. Hello Celestron Engineers – USB has been the primary way to connect to computers since 1996 – it’s long past time to adopt it).Celestron also gives the middle finger to Apple customers…apparently they don’t want them as customers at all. If you use a Macintosh but need to update your firmware you are out of luck. Same deal for Linux users.Next issue: doing the star alignment should be easy, but it is definitely NOT. Even the customers who like the product admit that it takes a lot of very careful precision to successfully align. The tiniest errors with leveling your mount, entering the time, or lining up the stars in your eyepiece and you’ll be stuck in “failed to align” hell. Be prepared to go through the alignment routine many times just to get started, then to repeat the procedure after you frustratingly lose alignment.When I realized I was spending more time aligning than looking at stars I gave up using the go-to feature. Now I just use the direction arrows to manually find objects. My own eye coupled with a handy app on my iPhone is far more effective than Celestron’s ineffective go-to software. It’s not that hard and kinda fun, but now I am stuck with this expensive go-to mount that is useless that taunts me every time I try to use it with how much money I wasted.The most frustrating part, though, is that once you think the telescope finally IS aligned it actually ISN’T. After alignment I’ve been able to get it to correctly point to a database object or two, but ask it to move to a third object and you can just forget it…unless you want to go through the 10 minutes of re-leveling and re-aligninging.In my opinion the mount, controller, and software are all junk. The optics are great…when you can get them pointed at the object you want to see.Buyer beware: This is a complex product, apparently built on an old hardware and software technology platform, that is frustrating and disappointing to use.Think about how amazing a go-to telescope would be if Apple or Google designed one. Celestron’s product is the opposite of what you just imagined. They can and should do better.
E –
I would have given this scope 5 stars, but, after my very first use, I had to buy an additional cord and adapter because it crashed. This was the second attempt to use the scope, after spending close to an hour, finding the perfect spot, setting it up, and deciding what to observe, the first power up for that day, the hand held controller displayed a boot error and there was nothing I could do to get it to power up. Extensive research on the web, pointed me in the right direction to fix it. So I waited for a couple of days to contact the manufacture and they confirmed what I learned on the web. The Celestron tech said he would send me the adapter I needed and followup with a email with all the instructions needed to get me back up and running. As of today, more than 3 weeks later, I have not heard from Celestron nor received any emails. Right after contacting Celestron, I went to NiceShine, and ordered the adapter, received it within 3 days, and reflashed the firmware and fixed the boot problem. Had I have waited for Celestron, I would have $2000 worth of unusable telescope equipment. Reading the reviews of Celestron’s customer service performance before I contacted them with my issue, help me make the decision to pursue an alternate approach for fixing my scope, nonetheless, the 8SE computerized scope I purchased new, should not have had these issues out of the box and, Celestron should be providing customers with everything they need in case common issues like the boot issue come up. They will ship you a cord for use to interface with older computers and require additional cost and down time with purchasing the correct adapter. Not a good business format. Thousands of dollars are spent on their equipment and support is below average. Celestron really needs to address these customer service issues.
Otto Zapata –
MOUNT and ARM: This is my first Go-to telescope after many years of manual equatorial mounts. I chose it due to size, weight and portability over a somewhat cheaper equatorial alternative that weighed twice (including conuterweights, mount OTA, etc).After playing with it for more than 6 months I have learned to like it. Mo more manual adjustments, or tapping, or turning nobs. This gives you more time observing which is increased by tracking system that keeps the object in the field of view for longer without any intervention. You will have to give up star-hopping techniques that so many stargazers enjoy though. Trade-off here. If you like the journey, as well as the destination you will know what I mean.Accuracy of GOTO mount is “good” enough. it really depends on how accurate you are aligning the mount, choosing the right coordinates, and time. Also, play with different 3-star alignments sets. You will quickly learn that more distant and diagonally spaced selections give you better results. I did not expect this type of mount point everything at the center of a high-power eyepiece every single time – you should not either. It will bring it into the field of view of any low-power EP however.OTA and Optics: exceeded my expectations. Concerns about manufacturing moving from California to China proved to be unfounded. It is amazing what you can get these days for such amount of money (go back in time 10 years you would have to invest several thousands for a quality OTA like size).Make sure you know this: get the external battery OR the AC Adapter if your location got a nearby outlet. The stock diagonal and eyepiece does not do justice to the OTA. So you will be investing in both. 2″ diagonal options from Celestron or GSO are reasonably priced these days.
catbiscuits –
Pros:This is a good scope if it fits your budget. You can add some eyepieces, a solar filter, and a starsense auto-aligner and really go nuts with it.The build quality SEEMS high. Nothing seems ready to break off.Cons:The scope is difficult to align if you are in a suburban, bright (light polluted) sky area with a restricted field of view like I am. It really struggles to find the stars it needs to under these conditions.The scope is pretty big, so you may find yourself negotiating with your spouse about room in the car for it.And the reason it’s not 5 stars, but 3 stars .Maybe I just had bad luck (why don’t I ever have good luck), but 2 years and 5 months of very light, occassional use and my scope’s motor control board bit the dust. Specifically the AUX jack is dead. How delightful that it’s just out of the warranty period. I can replace it myself, but for $114.Thanks a lot Celestron.
DerRalf –
This is an amazing telescope. However, it is not a toy. You have to have patience and add the right equipment to really make the telescope enjoyable. Do some research online to find out what you need with this scope. I really started enjoying it once I added an eyepiece kit from Celestron, a power tank (it will drain batteries quickly), a dew shield to prevent dew buildup and a few other items such as filters. Plan to spend another few hundred dollars if you want to have fun.You may initially run into some issues with aligning it. I had some trouble but I quickly found a lot of help online on how to solve those and then figured out how to align the scope spot on every time. I got this scope not just for myself but also to get my kids interested in astronomy, and showing them the moon, the planets, etc. gets them very excited. I can recommend this scope for everyone that is serious about astronomy, but not able/willing to spend a fortune on something larger. An 8″ gives you a lot of possibilities.
Will –
It works well overall. It can see deep space objects and planets in detail. You can see the divisions in Saturn rings and the bands in Jupiter. The hard part is you need a dark location and good sky conditions. Most of the time, it is hard for anyone living near a city to get both. Go to a local astronomy club location. Try before you buy. Truth is most of the time you can’t turn up the magnification to near max. You might do just as well with a 5 inch scope which is far easier to carry! One major con, the focus nob is all but useless. Look online for various add ons and change the knob. Auto align is often tricky as is using the red dot locator on the tube. It does work with practice but pick bright stars not in the same plane. If all you want to see is Saturn, it is easy to get the red dot on it and set the auto tracker to planet mode. It is quick and holds on the planet well. Look for nebula and clusters, here is where the 8 inch scope excels.
SOUTHERLAND –
I can’t say enough good things about this telescope. This was an upgrade from a Celestron 90SLT we bought about a year ago. It was also a good scope but I would only recommend that for beginners on a budget. If at all possible, I would buy one of the the SE series scopes (5, 6, or 8 inch). Our first night we were able to get awesome views of Saturn (and about 4 of its moons), Jupiter, and our moon (see photo). The photo I took was taken with my iphone held up to the lens (the lens was a 7mm Celestron XCEL). You cannot go wrong with this scope.If I were to list some minor cons, I would mention that this is a heavy scope and must be disassembled to move it in and out of the house. If this is a big issue for you, you might consider the 5 or 6 inch version of this scope. The optical tube is surprisingly light. The real heavy part of the scope is the fork arm where you mount the optical tube.This scope comes with a good quality 25mm eyepiece but I would recommend getting additional lenses or a barlow from the XCEL series.
William L Chamberland –
WOW. You’re going to be surprised if you can actually use this scope which comes with a new Hand Control but out-of-date User Manual. The online manuals have not been revised and are dated 2007. Technical Support will give you the run-around and advise purchasing a current model so you get the right documentation. Huh, I ask. Documentation for current but different models do not work either. No wonder the price is so low. If you enjoy trying to figure out what the manual actually is telling you to do, then you might be OK with this scope. It took me hours of personal time to edit and transpose old nomenclature in the User Manual to go with the cheat sheet that comes with the newer Hand Control. Technical Support did not respond to my offer of revised documentation in PDF format. The menu hierarchy is not included for the newer Hand Control so you have to figure that out for yourself. Furthermore, there are so many alignment procedures possible that one wonders how this scope can be easy to set up. It has failed to align properly 50% of the time. Good luck trying to home in on a faint object using the little bitty laser pointer. Do not purchase this scope unless you are a tech-savvy tinkerer and like a real challenge. It is difficult to use at best and definitely not light weight when you have to haul it around.
Audrey Sinclair –
I’m new to astronomy and proud to call this my first telescope. The reason why I gave it four stars was because setting it up was a pain. Not knowing how to set up a telescope I looked for the instructions on how to do so, which were very useless. They are very brief and seem to skip some things like how to put the optical tube onto the computerized mount. Long story short I ended up youtubeing videos on how to install this telescope which took me about 2 hours. Some good things about it is that it’s easy to take apart and put back together (once you get the hang of it). Also the nexstar is a great feature! The telescope will point to exactly what you want to see in the sky. Making this a great first telescope! I highly recommend getting a power adapter because the batteries do run out very fast. Overall I’m in love with this telescope and highly recommend it.
Reran –
Overall I like this telescope and give it 5 stars!Things that I love about this telescope are:1. Portable, not very heavy, and easy to set up2. Nice and big (8 inches of course) aperture. It could reveal plenty ofdeep sky objects.3. The 25 mm Plossl eyepiece, which come with it, was pretty usefulfor the very first setup of looking at the planetsThings that I dislike about this telescope, but could be fixed are:1. Some acccessories which come with this telescope. The finderscope is, IMHO, too small. You need to buy a new biggerfinder scope. The star diagonal is also not a good quality diagonal2. Vibration, especially if you slew the telescope using the handcontrol Nextstar+. It is not too bad though, the vibration usuallysettles in less than 2 seconds3. It does not have a clear setup instruction / manual4. The hand control Nexstar+ is not able to record the time, soI need to enter the time for every alignmentSome additional notes:1. When my telescope arrived I found out there was a problem withits motor. Thus, I called the Celestron technical service in CA. They tookcare the problem promptly! They asked me to return the whole box(postage paid by them) and resend a “new” telescope (again postagepaid!) in about 2 weeks.2. Since this is an ALT-AZ type of telescope, a long time exposureastrophotography is not really possible – in this case you need toadd an equatorial wedge for 8″ telescope (cost about $299)3. To make the process of alignment much easier, buy a so-calledCelestron StarSense (cost about $329). Also, buy some additionaleyepieces (32 mm or 40 mm, 5 mm, 10 mm or 15 mm) and a filteror two. I took the attached image of Saturn with a Samsung S6 Edge+camera, a 10 mm eyepiece and an UHC filter
Reuben –
The telescope itself is fine, a good product. The ancillary items are not worthless but nearly so. They cheapen the entire package.The spotting scope is somewhat flimsy but the real problems are: the lack of a cross hair in the scope so you get the exact center of the target item, You have to be directly behind the scope to even see the red dot and when spotting stars especially the dot is so large even on the lowest illumination the target is completely obliterated. You can get it close and jump the the telescope and hope you are lucky to find the target – usually you don’t and have to start over. Also the battery life of the spotting red dot scope is abysmal, maybe 30 minutes if you are lucky. Good thing on NiceShine you can find a good deal on them.The second cheap item is the spot level provided. It has a peel off sticky tape on the back to mount the level. the first time you bump it it comes off and you loose it. It would have been much better to have the level built into the base of the support arm.The instructions are minimal at best and might do for someone experienced in setting up and using telescopes. I am not and bought this model so If I liked it I wouldn’t have to buy a better model to improve viewing. Over all the entire process is user friendly at all!Have viewed Jupiter and Saturn and they are recognizable and the spotting scope does ok. Distant stars would be impossible especially if you use the lower powered eye pieces provided in the accessory set.
Warren Landis –
I have had this now for about 2 weeks, and needless to say, I am in love with it. I have found using the manual 2 star method or the solar system method for alignment works the best. I use google skymap to confirm the stars I am using for alignment.I bought it with the accessory kit, the electric adapter (the telescope should come with this), the lens kit, (a must, just for the filters alone, but the additional lenses really give you great views of the planets. I actually got a few “Wow’s” from my wife. And the case, be warned, the case for the 8″ only fits the tube and some small accessories, and not the electronics or the tripod.Update: 4/19/2017I added my first pics of the cloud bands of Jupiter, these pics are taken with my cell phone mounted to the eye pieces. Having it now for a few months, I am really getting the hang of aligning it, and getting it to properly track the planets. Be warned, though, once the bug has bitten you, you will want more. I am now looking at a 14″, but that will be a while. I still have so much to learn, but the accessories I am buying, are with that eventual larger scope.Clear Skies!
Herb H –
This review is for the NexStar 8 SE, the 8 inch one … Got it as an NiceShine warehouse deal which shaved off $200, was in absolutely perfect condition. Easy to put together and set up. Make sure you get the AC adapter because it eats trough batteries pretty quickly.Even though it’s an Alt-Azimuth mount (not an equatorial) it tracks objects pretty well. The picture on the right is the Orion Nebula M42, I took the picture two weeks after I got the telescope. I attached a Canon EOS T3i with a t-adaper and added a Celestron LPR UHC filter to reduce light pollution. The final result is 50 10-sec frames, stacked. You can see a video of the whole thing on YouTube under Nm7Pxb3jENs .EDIT June 2022 : Added more pictures obtained with it and a newer Canon EOS T6i.
Review –
Great telescope. I got it as my second telescope after buying a dobsonian 6inch. I wanted something that was easier to store and put away when I’m not using it. It still takes up quite a bit of room but its a lot more flexible on where you can put it than a dobsonian telescope is. You will definitely need to buy the power tank so you can take it anywhere you want to observe. The tracking/goto system is sort of difficult to get set up but you don’t need it to enjoy the scope. I personally have never gotten it to track 100% accurately yet but I have only tried to track anything maybe 3-4 times since getting it. The telescope remote seems to have issues functioning in temps below 15 degrees F. The motor itself seems to run fine in very cold weather. Even works great with a solar filter to look at the sun with. I’m not sure I would recommend this to beginers I would say maybe try the 5 or 6 inch just for the greatly reduced cost. I would also recommend getting a dobsonian if you have the space for it over getting this. But if you are like me and don’t have a lot of space to store a massive telescope and want something that can be reasonably easily moved and set up. Then this is the telescope you want. Given the chance to do it all over I would buy this telescope a second time._________________________________________________________________________________ProsGood quality material. Everything looks and feels great.Good stand and motor. Motor works in both hot and cold conditions. As long as you keep the remote warm the motor seems to be able to go as cold as you are able to go with out freezing to death. I also used it in the sun for almost an hour and it worked well through that. (Make sure to get a good solar filter though)Great detail on the objects you are viewing. I get great views of the moon, Jupiter(And its moons), Saturn, nebula, and other objects. Its really amazing.Easy to set up and easy to store. (I’d keep the foam from the boxes you get so you can store the telescope in that on a shelf instead of spending 200+ dollars on a case for it.)Easy to use the basic features on it._________________________________________________________________________________ConsWhile it is easy to set up and move it can take awhile to transport and put together if you are a lone. If you are moving it from storage to your drive way it might take 2-3 trips. Its easy but it just takes time.The goto/tracking system is fairly difficult to use. This might be made easier with a better finder scope. The one that comes with it is kind of bad but thats normal.It takes much longer to set up than a dobsonian does. Maybe 15-20 minutes to move and assemble from a closet into the drive way.The remote does not function well in super cold weather. Under 15 degrees F you will only have maybe 30 minutes before the computer in the remove starts freezing up literally. You can help prevent this by putting the remote in your coat._________________________________________________________________________________Recommend items to have or buy when you buy this scope.”Celestron 18778 AC Adapter” Pretty much required to even use the telescope I’m not sure why this isn’t included with the telescope.”Celestron Power Tank” I HIGHLY recommend you get this with the telescope. It works great as a back up light/phone charger during power outages which I have used many times since buying it already.”Celestron 93230 8 to 24mm 1.25 Zoom Eyepiece” This thing is pretty much all you need starting off. You don’t have to unscrew other sights and let objects slip away. You can just put this thing in and see great detail and have the ability to quickly zoom in. The value this eye piece has is pretty insane.”Any phone telescope eye piece mount” Its a great cheap way to get some astrophotography pics of the moon and maybe if you know what you are doing some other objects as well.
Shane A. White –
This is a GREAT telescope. Don’t let other reviews or Youtube videos try to convince you that you should go with the 5″ or 6″ since they are smaller and more portable…light gathering ability is EVERYTHING in a telescope, and the 8″ gathers ~78% more light than the 6SE model.Out of the box, however, so you are not disappointed, there is a bare minimum of two accessories that you MUST have:1) Either an AC adapter to power the scope or a Celestron “PowerTank” or a car or motorcycle battery with a car adapter cord to plug in to your telescope. I have the Celestron Power Tank 17. The power tank uses cigarette lighter style power cords which you can also plug into your car’s dashboard if observing remotely next to your vehicle and you buy the car adapter. Although the scope can run on AA batteries, it will eat them up in less than an hour, rendering the scope slow and eventually unusable.2) Buy a dew shield (Celestron #940009 for 8″ scopes) , which is only $23.00 or so…that will keep the night dew from forming on the front of the telescope’s “corrector” (the front of the telescope) as the temperature drops at night.The above is the bare minimum I would order if buying this telescope. Anything less will adversely impact the enjoyment of it.Expectation management: With the above, yes, in the summer in the Northern hemisphere, you can see the rings of Saturn and you can clearly make out Jupiter. It will blow your mind if you’ve never seen those planets with your own eyes. However, don’t expect to see great detail and have the image fill up the view as some of the pictures in these reviews indicate. The human eye cannot see the color and detail that a long exposure (30 seconds or so) can reveal when you hook a camera up to this telescope. You will immediately want some eyepieces that allow you to zoom in further, so let me help you with that process.I strongly recommend that you buy a 2″ diagonal and eyepiece setup. Again, the scope, out of the box, only comes with a single 25MM 1.25″ eyepiece, which has a narrow field of view and not enough magnification to really enjoy your first astonishing views that get you hooked on astronomy, like looking at Saturn and seeing the gaps in the rings.Celestron sells a kit that has a diagonal, 2X Barlow Lens and three 2″ eyepieces (Kit #94305 – $300.00). You can buy that for starters to get you going with 2″ eyepieces at the lowest cost.If you have the financial means to “do it all right the first time” without buying the same type of things twice, I would recommend that – instead of buying the 2″ starter kit – you buy the Celestron 93527 2″ diagonal, which has the Starbright XLT coatings and can be used with 2″ eyepieces as well as the 1.25″ eyepiece that comes with the telescope, the Celestron Luminos 2.5X Barlow lens (#93436) which will allow you to more than double your magnification with any eyepiece, and some better eyepieces.Most people will tell you that you can get by with about three eyepieces initially. Here are some recommendations:If money is no object, buy TeleVue. They are the high-end in the telescope world. Around $300-$800 each depending on what you choose. If you are going to spend that kind of money, join the CloudyNights forum and get some custom-tailored recommendations from other TeleVue users.I’m going to stick to cheaper (but still good) products that are well respected and a good value.First eyepiece: Meade Instruments Ultra Wide Angle 20mm 2-Inch Waterproof Eyepiece (7743), which you can get here on NiceShine for around $120. With the aforementioned Barlow adapter, that will give you 20 MM and 8MM views.Second eyepiece: Explore Scientific 82° 30MM eyepiece. In order to use it, you will have to add a longer dove-tail rail to your telescope to move the scope farther forward in the mount to balance it out.I use an ADM V Series Extra Long (VC-8XL). I had to cut the aft mount bracket to make it fit on this telescope. With the 2.5 Barlow, that gives you 30 and 15MM views.You can buy Celestron Luminos eyepieces, but they sometimes suffer from Edge Of Field Brightness (EOFB) which some astronomers find distracting. If you go with Luminos, buy the 19MM and 23MM. I own those two, but they are not as good as the other two I recommended.If you did not know it, in the telescope world, the smaller MM eyepeice means more zoom-in (greater magnification). You divide the focal length of the scope (2032MM for the Nexstar 8SE) by the eyepiece MM to get the zoom…Example: 2032/19 = 107x. You can use the diagonal and eyepieces I have recommended with larger Celestron telescopes should you upgrade in the future to an even larger telescope (I have a Celestron C11 on a CG5-ASGT mount as well).This scope is perfect for a beginner, can be set-up in about 10 minutes, and aligns easily by pointing to three bright objects in the sky. It is the ultimate “grab-n-go” telescope. It is NOT ideal for astro-photography, as it is an Altitude/Azimuth (ALT/AZ) telescope and BOTH motors must run at the same time to track an object, which is not as precise as a German Equatorial Mount (GEM) where only one motor has to run to track an object. GEM’s require polar alignment, which is a bit complex for the beginner.If a bigger easy-to-use ALT/AZ scope is wanted, the next step up from the 8SE would be the CPC Deluxe 925HD (9.25″) or CPC 1100 series (11″)…or if you get into Astronomy and astro-photography, jump to a GEM telescope.4 Stars since it does not include an AC adapter or DC cigarette lighter cord out-of-the-box. With those items, I’d give it 5!Perfect value beginner telescope. Needs power adapter (AC, Cig lighter or powertank) and eyepiece upgrades to really be fun…
J. T. –
In my opinion, the Celestron Nexstars are the best overall, general purpose telescopes money can buy (tripod, mount, and optical tube in a single package). I have used both the 4″ and the 8″. There are trade-offs with size.The 4SE is very light, more stable, easy to carry in one piece outside your house, adjusts to temperature differences rapidly, and has razor sharp clarity without ever requiring mirror adjustment (collimation). You can see pretty much every object with the 4 that you can see with the 8, it’s just dimmer.The 8SE is bulkier, heavier, shakier, harder to carry in one piece, adjusts slowly to temperature differences (sometimes 1 hour), but everything looks a little bigger and brighter, and it requires occasional (a few times a year depending on how rough you handle the scope) mirror adjustment with a screwdriver which can be annoying if you are a perfectionist. The better your collimation, the better your clarity.You can’t really go wrong with any size. Get what fits your budget. My advice if you get one, get a 8-24mm zoom eyepiece, a 32mm eyepiece, and you are good for years of enjoyment. Keep the legs low to minimize shaking, sit in a chair, and buy the anti-vibration pads (generic brand is just as good as the Celestrons). Once you master this telescope, you can upgrade the mount if you want to get into more advanced photography. Keep looking up!
Metrologist –
Star Align works really well. Hint, use two star auto align. The included finder scope is total garbage and should be the first thing you replace with the Telrad Finder Scope. I’m mean really, the included finder scope is practically worthless! The AA batteries in the base work for about 20-30 minutes so the Celestron PowerTank will be needed for extended movement. The construction of the tube and optics is solid for a scope in this price range. The keypad and menus are fairly intuitive. The tripod is sturdy however because of the nature of the scope mounted with a single fork it produces vibrations. Their newer more expensive models have the scope mounted with dual forks. You will pay more so that is something to consider. Overall, it’s a very decent scope at this price point. It produces great views of nebula. With the moon in the first quarter and the Orion Nebula directly beneath it, the Orion Nebula could be easily seen albeit washed out. The included 25mm lens is okay but you’ll want to upgrade to the Celestron X-Cel Series or equivalent eyepieces for better viewing. Conclusion: I was very impressed with star align. The initial setup is easy. After the setup, it makes transitioning to deep sky objects effortless. It’s a very good scope in this price range. I’ve used lesser priced Dobsonian scopes and I prefer this for portability and ease of use. It’s a good scope!
ICEMAN –
When I was a kid in the late 60’s, my folks got me a Tasco telescope, had a lot of fun with it. In 2007 I got a Bushnell reflector telescope as a gift. Both telescopes were the lower end of the quality window but still enjoyed using them.I finally decided to upgrade for several reasons. Neither telescope would track an object through the night, after about a minute in the eyepiece, the object would be out of view and a readjustment was necessary. Finding anything in the sky was a pain as I had to rely on my knowledge of where to point the telescopes. The Bushnell came with a sort of ‘guide’ to help, and it did, but it was just mainly in the general direction to point the scope. And then the lenses that came with both the telescopes were cheap and hard to focus. These telescopes were very beginner based models.After looking around on the web, the Celestron telescope was often mentioned in the top 10 or so of quality scopes to purchase for the price, and the Nexstar SE series was getting very good reviews. After much deliberation and a cut in price of over $200 one day, I ordered the Celestron NexStar 8 SE. I also ordered the X-Cel LX 25mm, 9mm, and 5mm eyepieces to go with it, it comes with a lower quality 25mm Plossl lens. I also got an X-Cel 2x Barlow lens and a zoom lens from Celestron, the zoom works okay but is not in the same league as an X-Cel, and a Celestron StarSense Automatic Alignment device to help in locating celestial bodies. Also got the AC Adapter as the reviewers everywhere said don’t rely on the 8 AA batteries to run the device as they die quickly.Of course the day it arrived it was cloudy for three nights, which gave me a chance to really review and read the instructions. It was delivered safely and fast, the telescope was in a box, in another box, and then another box in foam, so no problems there. If I had any issues, it was with the assembly instructions, they never actually show you how to put the orange tube on the fork, which IMO was the most important part. After looking at the pictures in the manual and checking Youtube vids, I was able to figure it out (I had it on upside down and backwards). Otherwise no problems.Once I had a clear sky I took it outside at dusk and set it up, just lined up the index points and aimed the scope at the horizon, leveled it by eye and took off. I did use the StarSense Auto Alignment unit to calculate the position and within about 7 minutes was enjoying the sights of Jupiter and the Moon like I had never seen them before. Saturn is still below the horizon, but I can imagine it will be a sight to see also. The telescope is definitely worth it, the X-Cel lenses are a must, so clear and great views and focus ability. The zoom lens was actually used the most as I could capture an object in the sky and then zoom in and out easily, and the zoom lens has a rubber eyepiece so you can still wear glasses if you want.The absolute best part was being able to use the handheld remote and tell it to find something, a star, galaxy, planet and then it slews right to it. The first time it was a little off because of user inexperience, so I doubled down and researched it, actually called Celestron and talked to a live person and then the second time was ready. You do need to keep a few things in mind.Try to insert the EXACT time into the controller ( I used my iPhone, I just set it for the next minute at 00 seconds, and then wait for the second hand to hit the 12 and then hit enter on the controller, perfect), be sure to set the time correctly, UTC 24 hour time (i.e. 9PM is 2100), make sure you have the correct time zone and daylight savings time set correctly.Also try to set the correct location as close to where you are setting up, again I used an app on my iPhone to give the correct longitude and latitude coordinates. You have to enter the degrees and not the decimal coordinates, also make sure to get the north/south and east/west location right.Then you have to align the scope to find out your best calibration, take your time, it is definitely worth it. I used the StarSense Auto Alignment method, so your calibrations may be a different set of instructions. After the final alignment (which took all of about 5 minutes), I told the hand controller to find a star and it slewed right to it, in the absolute center of the eyepiece and then tracked it for as long as I had it on there. Fantastic, it was doing everything it was advertised, I am very happy with this purchase.It is a heavy telescope, I have to have help to move it safely in and out of the house, you may be able to move it by yourself, or take the tube and fork off the tripod and reassemble in your viewing location.Only con I can see is the hand controller is a bit hard to see at night, just a little dim, I remedied that with a small flashlight with a red lens to keep down the light pollution, but I found you can control brightness and contrast on the controller so problem solved.Very glad I finally have an almost pro (IMO) telescope. After I see an object I can tell my wife to look at it and she was amazed at the improvement over the Bushnell scope, and since it tracks the object, no need for a readjustment every 45 seconds…Great value for the money, great construction, I called Celestron for help and was talking to an expert in two minutes who knew exactly what I was talking about, would recommend this telescope to anyone who wants to experience astronomy.
Michael Davis –
I have waited quite some time since purchasing this telescope to write this review. I wanted to test it under different conditions and our weather hasn’t always cooperated with viewing. I am impressed with the alignment process, when it works. Several times I found the three bright objects as per instructions, centered them and waited for the process to complete only to have the message “alignment failed” scroll across the display. I had to purchase to 110 volt adapter because the batteries drained so fast and don’t expect the scope to find objects with low batteries. My biggest complaint with the telescope is the vibrations, the single arm mount is anything but rock steady. It does perform very well as a ‘carrier’ for my DSLR when it is piggy-backed on the scope, but not when you try to shoot thru the scope. All in all, I wish I had spent a little more and got a Meade.
W. Smith –
The telescope got here ahead of schedule. It was packaged very carefully for maximum protection during shipping, with no discernable flaws or defects associated with any of the components. An initial star collimation check indicated it was well aligned during the manufacturing process and was still well collimated when I got it. I have invested in an AC adapter, an 8 – 24 mm zoom eyepiece when I bought the scope, but have since added an illuminated reticulated 12.5mm eyepiece and a solar filter and am looking forward to getting more accessories in the future. It is a high powered device, so with the standard 25mm eyepiece (81x) and the 1.25 visual back, you can’t quite get the entire sun (NEVER AIM THE SCOPE AT THE SUN OR LOOK AT THE SUN WITHOUT AN APPROVED SOLAR FILTER INSTALLED) or moon in one shot, so I’m going to get an f6.3 focal reducer/corrector to fix that. It’s a fairly big scope for a beginner but in my opinion is still good for someone breaking into the stargazing hobby. I’m looking forward to a great time observing with this telescope.
Luis Padilla –
This is my second telescope, waited 16 years for a telescope with all these features and size. The 8″ aperture do make a difference. You can go plain vanilla, but in order to make it more easy, therefore more fun, certain gear must be replaced or acquired.1) The original viewfinder sucks, has to go…fast. Try to get a “Telrad Finder Sight”, that thing is awesome, easy use and easy to mount. https://www.amazon.com/gp/product/B0000ALKAN/ref=ppx_yo_dt_b_asin_title_o03__o00_s02?ie=UTF8&psc=12) Get the “Celestron 18778 AC Adapter”, the telescope will eat batteries like a boss, 8AA in an hour or less. https://www.amazon.com/gp/product/B0012YXF1O/ref=ppx_yo_dt_b_asin_title_o03__o00_s02?ie=UTF8&psc=13) Instead of buying full set of eyepieces, go for “Celestron 93230 8 to 24mm 1.25 Zoom Eyepiece”. Its like having a full set of eyes pieces for half the price the set. https://www.amazon.com/gp/product/B0007UQNV8/ref=ppx_yo_dt_b_asin_title_o02__o00_s00?ie=UTF8&psc=1The photos were taken using a Canon Rebel EOS T6, using ISO 1600 and 15 secs exposure for the deep space objects.
derek808 –
i love this 8se! i had a celestron 130 computerized before this. i decided to pull the trigger on this 8se. the good thing is that i had my televue 22,18.2, 13, 7, 6-3mm nagler and delite eyepieces and battery tank.i bought a new laser view finder with changeable target pointer. i updated the nextar hand controller firmware. there were 11 online updates. see youtube for instructions. youtube is an awesome source for 8se options.i also bought the skyportal wifi. it lets the 8se work with my samsung 9 by using sky safari app goto mount with 40k celestial objects hands free! sky safari app uses my cell phone’s gps coordinates. i still have the choice to use the handheld controller that comes with the 8se.attached is a pic of the super wolf red moon using my 8se and televue nagler 22mm eyepiece with my nikon D7100 @ honolulu hawaii on 22jan2019. the moon was low on the horizon = not that sharp.if you have any questions about my set up. let me know!
Mr. Malia –
This telescope is amazing for the price. If your wanting to do astro photography with it, I would recommend getting a better mount and not something that requires a wedge. The wedge is a poor alternative. I mean it works but it takes alot to make it work. I got good shot of orion, stacked the images and processed and stretched the image through photoshop and got my finished result. Also got some photos of the moon, they were alright. But totally recommend this scope if you just getting into observing and astrophotography 🙂
Jeff Williams –
So I’ve had this for a few months now and I was REALLY pumped to get it for myself and for the kids. As of right now, I have yet to align this. I tried a few times and “no database” was found, then when I finally did align it and asked it to find Saturn for example, it went to the complete opposite side of where it really was in the sky. Then I asked it to find another and same thing. Pretty frustrating for what this SHOULD be. Hopefully I can figure this out soon, but if not it’s just going to be a waste of money. Sometimes too powerful might be too much. That being said, its very solid, well built SEEMS to be able to do a lot, I just haven’t been able to figure it out yet, and I am pretty tech savvy!
Tez –
I had purchased this Celestron NexStar 8 SE Telescope to enjoy the night sky. I am definitely a beginner and this is NOT for a beginner. I have learned, with LOTS of patience, on how to use this telescope. I still cant get it to Calibrate but I will get there. I have, however, seen the Moon up close and it is AMAZING. Jupiter and Saturn, I never thought I would ever get to see them so close. It is a bit heavy and bulky to lug around but it is a great piece of machinery.SO… not for beginners a bit bulky to cary around and it takes a few tries to Calibrate.on the other hand… it works amazingly well once to jet the just of it.Take your time and get to learn the this Telescope and in no time you will be enjoying the stars.
Sami Najafi –
I got this telescope from NiceShine Warehouse slightly cheaper but it looked brand new to me when arrived. I’m loving this telescope more and more. Setting it up was very easy. Interestingly, I spent a lot of time make the telescope be aligned by using the star-sense device (a complementary device I got for $300 for aligning the telescope) but after two days I had to give it up as the device could not do its job perhaps because of light pollution in my location. So, I started using the telescope’s provided score-finder. I had read a lot of negative reviews about it and for that reason, I was even avoiding trying it. Interestingly, the scope finder (by using its red light) is amazingly accurate and simple. I put a small piece of cardboard between the redpoint-finder and the telescope to make sure it is perfectly parallel to the score. Other than that, it works amazingly accurately. I’m a beginner and am keeping learning how things work out yet. I am now trying to figure how to see Jupiter cloud bands distinctively using this scope. But so far my impression is that I found it very powerful. Also, I’m returning the star-sense device. Not sure, if you really need it… or at least I found working with it pretty harder than simply using the telescope’s basic finder scope.
an_instructional_sys_designer –
I did my homework before dropping almost $1200 on the 8se, I looked at the 6se, and various size dobsonians, but I wanted something that could help me find objects, was large (lots of light pollution to cut through where I live), and was portable (the 8se is on the heavy side, but will still fit wrapped up in a large rubbermade-like tote, which will also fit in the backseat of a typical sedan). There is already a lot written on the red-dot finder that comes with it, which is fine for pointing at large planets and for initially pointing the telescope, but I added the Celestron RACI (right angle correct image): https://www.amazon.com/gp/product/B00DEOM534/ref=ppx_yo_dt_b_asin_title_o03_s01?ie=UTF8&psc=1Without this upgrade I’m not sure I could have ever found Uranus and Neptune. There is also a lot written about the batteries, it will go for a couple hours on 8 new AA’s, but get a power supply, I use: https://www.amazon.com/gp/product/B01680EQ1E/ref=ppx_yo_dt_b_asin_title_o03_s00?ie=UTF8&psc=1I use the three star Sky Align, it does a good job of tracking and finding objects (take your time during the alignment process), it also works fine in manual, motorized pan & tilt mode or solar system align (like when tracking the sun during a transit, be sure to use a solar filter!). I use an adapter to take pictures with my iPhone 11 (the pictures above). The tripod it comes with is pretty sturdy, be sure to level it on the ground before aligning the telescope. Good luck.
Nathaniel C. –
Hello everyone! I purchased a Celestron 8SE package through NiceShine shortly before the Christmas holiday for me and my family (ok, mostly for me!). I wanted to write this review because I probably made a mistake buying that package, which, of course, is only an opinion which benefits from hindsight. I normally pride myself on doing adequate research before buying a product, but I guess I didn’t realize how much I wanted to try astrophotography until shortly after I received the scope in the mail. I was really drawn to the ‘goto’ capability, because I wanted my family to have an easy time getting the most out of the scope. I did read some reviews and many people posted cool pictures of the moon, solar system objects, and even some deep space objects — those seemed to be enough to convince me.So, there are good parts of the package. The scope seems well built. In my uninformed opinion, the optics are clear and the scope came perfectly collimated. The mount, while it has deficiencies, is actually pretty easy to use. It’s also very easy to assemble and disassemble, very light, and again, in my opinion, is pretty sturdy. It’s very easy to do a three-star alignment. My first attempt was spot on and a solution was found. All of the various pieces that came with the package seemed well built, except for the spotting scope (more later) and perhaps the diagonal — it’s very cheap plastic and doesn’t inspire a lot of confidence in the quality of the mirror.The bad parts? Well, they might not be bad for certain people, so I’ll leave the judgement up to you whether these issues are a ‘negative’. First, the cheapo spotting scope never worked. I did email celestron on the day after christmas and I had a new spotting scope — the upgraded version — before new years. So kudos to Celestron for their quick work to fix the problem. The package came with one single eyepiece, a 23mm plossl I think, and it’s the least clear eyepiece I now own. Now, on to the mount. I read that the mount “isn’t great” for astrophotography, and honestly, at that point, I didn’t think I’d get ‘the bug’ for it. After a couple weeks, I bought a T-adapter for my wife’s Nikon D5100 and started to take some really cool pictures of the moon, venus, and even some quick exposures of deep sky objects. Once I really learned about astrophotography — at least, as much as you can in a few months — I realized this mount is just simply inadequate. Apparently there must be bicycle gears inside because it’s not smooth, at all. The higher the objective is from the horizon, the worse the mount performs. When Sculptor was about 30 deg off the horizon, I was able to get 8-10s exposures. That same night, andromeda was about 70-75 deg when I started, and I couldn’t get more than 4s; not acceptable. That was really the moment I decided to buy a new mount, and also the same time I somewhat regretted my purchase.In terms of performance for visual astronomy, it seems to be ok enough. I’ve tracked venus for a while and it generally stays close. It does drift considerably over time, which is a natural effect of an motorized system trying to track anything without corrections, so this is expected. It’s easy enough to set the slew speed slow and center the objective and it tracks just fine for a while. Again, there is a direct relationship between tracking performance degradation and the elevation of the object in the sky. I suspect there is a large amount of play in the gear system which causes backlash that is exacerbated when one axis of the mount approaches perpendicular from the earth.The other part I wish Celestron would’ve improved is the focus knob. I mean, that thing just sucks. It has only one focus mechanism (no fine focus) and is pretty hard to accurately focus, but overally pretty easy to roughly focus. For casual visual observation, it’s not a big deal. For astro, it’s a pain in the royal butt to get focused right. I just got the Bahtinov mask in a couple days ago, so I’m hoping that’ll make things a little easier. I’m not a fan of spending ANOTHER $350 on a fine focuser, so I’m going to create my own remote focus apparatus with a low RPM gearbox motor, belt, some type of attachment to fit over the focus knob, and a metal bracket. I’ve seen some designs online and I think I can get that going pretty quick. Eventually, I’m going to integrate the focus control to an image processing service to auto-focus the scope. Just keep in mind this can be frustrating.What I didn’t realize when I purchased the scope was how much I enjoyed doing astrophotography. I’m obviously a total newbie, but that type of hobby is right in line with my interests. I’m a very technical person, current engineer on a very cool project integrating instrumentation hardware/software interfaces, so the nexus of electrical engineer and software is my real passion. So, hooking up the scope, mount, camera to the mount, creating an effective workflow to automate the process is super interesting to me — and it’s really just lackluster with the mount. I also didn’t even think AT ALL about buying an APO refractor. In fact, with the amount of money I’ve spent so far, I could’ve easily bought a decent APO and a good EQ mount, and probably a guidescope and camera. But, such is life. Live and learn.I’ll probably try to recoup a few hundred dollars by selling the Celestron goto mount, if possible. It’s probably great for a casual hobbyist, but I tend to take things to the exteme.Anyways, I hope this review helps people understand the quality, performance, and limitations of the 8SE GoTo package. I would give the setup a 4/5 stars — because, it does exactly what you’d expect in terms of performance and quality.
EasTexSteve –
I bought this with the case, splitter cable, wifi adapter, AC adapter, and lens accessory kit. You WILL need the lens kit, and AC adapter unless you have an endless supply of alkaline batteries. I have some telescope experience with refractor scopes, but nothing as sophisticated as this. I’ll tell you right up front: THIS IS NOT A TOY. It’s all about the setup and initial star alignment before you start viewing. The tripod has to be LEVEL. Make sure you mount the telescope into the arm as far forward as possible. The spotting scope has to be adjusted DEAD ON. You need to learn the alignment process carefully. When you align to a star during the initial alignment, that star needs to be right smack in the middle of the viewfinder before you push the ALIGN button. And, if you bump the tripod at anytime during the alignment, or anytime during the night of viewing, you may have to do a realignment. But, the more of these you do, the faster you will get at it. When you enter your location info, you need to put in the exact latitude and longitude and elevation of where you are standing for best results. If you do all this correctly, the telescope will literally slew to any target you choose and it will be right in the center area of the viewfinder and track it accurately. And, it will do this all night long. You can change lenses once you slew to a target, and it will still be centered and in focus. The easiest way to accomplish the initial setup is to do it in the daylight before it gets dark. Also, do your initial focus during the daylight hours. Give yourself a couple hours or more to do all of this. Read, read, read the documentation. Learning this telescope requires patience. But, once you figure it out, you will be amazed at what you can view. And, I’m doing all of this with just the telescope without using any additional software or my cell phone. I’m fixing to get into all that at my next viewing session. About the AC adapter. They should have used a better plug and socket setup. If you wiggle it, it will lose connection and cause the telescope to reboot. The way around that is to use a small piece of gorilla tape several inches behind the plug and tape it to the top section of the motorized mount.
OneLove –
I would not buy this as your first telescope. A 4″ or maybe 6″ dobsonian telescope is a good entry level purchase. The 8SE is simply too expensive and sophisticated for a first time telescope user. That being said, it is rather simple to operate with a basic knowledge of the sky and willingness to figure it out. This telescope offers many accessories and customizable settings that a first time telescope user will not be able to utilize this scope to its full potential. This telescope replaced my 4.5″ computerized dobsonian telescope. It was a great step up and required about 3 hours of familiarizing myself with settings and operation before I could use the scope to Its full potential.You should seriously consider purchasing an external battery pack to power this telescope. The 8 AA batteries just do not provide enough power, they should really only be used as a redundant power source. This way if your telescope is unplugged during use, it will not lose its alignment. If you will be using the scope near an outlet, the AC to DC power cable is a must have. I use my 8SE in remote locations, though. Instead of purchasing the Celestron brand power bank for $150, I was able to use a portable car jump starting battery that just happened to come with a laptop charger the exact size the Nexstar uses (5.5×2.1mm). This has worked great and I am not needing to buy 8AA batteries for every 20 hours of use.
Raj Agarwal –
The highly anticipated telescope arrived for my wife’s 45th birthday. Major Disappointment! MAJOR!FIRST, I tried to assemble the tripod, which was obviously used, with rubber feet scuffed up. One leg of the tripod was hyper extended, making it impossible to balance to celestial plain. The eyepiece tray was mounted at a tilt because of the hyper-extension. I could over-extend one leg to compensate, but I would never get auto-tracking.SECOND, the main red telescope tube has scuff marks and scratches. Looking past the esthetics, there were parts missing. The plastic packaging had been ripped before, the (a) 25mm eyepiece was missing, making this unusable, even in a repacked condition. (b) The star-scope viewfinder was also missing.THIRD, the Celestron tech-support is a JOKE. I tried calling them 3 days straight to figure out if I could adjust for the hyper-extension somehow, but they are non-existent. They make it a point to tell you to not return the scope for missing parts but are unwilling to help (GET REAL!) The tech-support is open from 12-4pm Pacific (huh??).This company is an obvious joke. The comet Neowise made quadrupled their business overnight and now they couldn’t give a rat’s behind for quality control. This is their flagship product selling for nearly $1,500+ with accessories as a starter package. Shame on CELESTRON! Can’t expect much better from a Chinese manufacturer these days.CELESTRON, if you are reading this, AMAZON.COM is not a DUMPING GROUND for your used/refurbished/discarded garbage. Please maintain the sanctity of NiceShine and NiceShine shoppers.
Dr. Manhattan –
This was my first big scope expenditure. I started with your run-of-the-mill highly disappointing 60mm big box store 1 million power refractor telescope and I eventually graduated to small reflectors and dobs. All I can tell you is that this is the scope that I use more often than any other scope (and I have an insane collection). Mind you, I have invested significantly in this scope since I first purchased it 2014 but even in its stock form it still amazing. The price is basically the same since 2014 and this scope is by far the best bang-to-buck in amateur astronomy. It has some shortcomings rest assured but if you have the money and patience do not look elsewhere.
Donald R Thompson –
I have tried the alignment via Sky Align over 20 times and it has failed every time. The finderscope is horrible. You can see the object with your eyes but through through the finder its gone. If you eventually find it the red dot is so big as to make the alignment irrelevant. Connection via USB mini -nope…wont find it. Essentially this is a manual telescope. I would return it if I could. Horrible investment. UPDATE 9/18/2020: After hours of trial and error, i managed to get the scope aligned using Solar Align, then on to the challenge of trying to get the scope to work via PC. This took over 24 hours of time, first you need to make sure you have Java Runtime installed, there is no message or alert that this needs to be done so you have to just know it apparently. I found it out by trying to run CWPI and then searched for drivers, there is a driver option on the Celestron website but when you download it the .jar file will not function without Java. the Read me notes are the only way to know this. Once done and restart, CPWI will then actually find and connect with your handset. The diagram with the driver download shows two connections for the 8SE, a USB/RJ-45 for the Mount and the USB-mini USB for the handset. Nothing really mentioned about the RJ-45 so I purchased it in the troubleshooting and now dont apparently need it. Also, before you start all this -reset the scope to factory settings. Bottom line -this is not easy to get done by any means. The FAQ’s are very unhelpful. The user manual is not helpful, the interface for CPWI is not super easy to learn. Even Still -I am happy with my purchase now that I am up and running.
BgSkyFlyr –
It shipped fast and got it in perfect condition, set it up and everything is working as it should. Beautiful scope and very nice quality, tripod is very sturdy and did some terrestrial views to align the Red dot finder. You will need to do the finder mod where you take a strip of notebook cardboard and slip it under the back of the finder base so you can adjust the finder red dot properly, there’s a video of this on Ytube. I will update again upon using it at first light. All electronics are working as they should so far. Only Con on this has been mentioned is the 8 AA batteries, definitely recommend the TalentCell 6000 MAH Lithium ion battery for this, Model : YB1206000-USB ( here on NiceShine) and a 6 foot 5.5 X 1.2 barrel connector (both ends) cable Positive in the middle It may be a bit long probably a 3 foot cable would work but you need it a little long as it moves you don’t want it pulling on the cable, and this depends on where you place the battery. This will give you hours of usage from what I have read. Came with a very nice quick start guide and full manual and separate quick reference guide for the hand controller. So far very pleased with this purchase. I have been in astronomy now for 25 years and this is my first GoTo scope. I feel this would be no problem for a beginner to learn and use, it’s not complicated and the 8″ aperture is definitely the way to go if you can afford it. Lot’s of videos on YTube to help or forums like Cloudy Nights.UPDATE: Got to use it last night, Awesome scope, SkyAlign worked very well, I used Google Earth to get my exact coordinates, I live in the country and entered them in on the Custom site entry. I used the TalentCell 6000mah power supply, I used it for about two hours and had 4 led’s on the power supply left out of 5. Very happy with this scope, beautiful image and it was also perfectly collimated. I also purchased the GSO SCT Dielectric 99% 2″ diagonal for it, it also came with the 1 1/4″ reducer highly recommend if you want to use 2″ eyepieces! No problems with the extra weight, just make sure you move the scope as far forward as it will go to clear the diagonal from hitting the mount, had about 1/4″ clearance for views at Zenith. The bigger diagonal also moves the eyepiece up and back from the rear of the tube so your head will no longer bump the tube when viewing, it also gave a bit brighter and sharper view due to the higher quality mirror. Thank you NiceShine for carrying this and shipping it to me so fast!!!!!
Elle –
Where to start…first, I am so happy with this telescope! We transitioned from the Celestron 80MM Star Sense Explorer to this scope. Quite a jump, I know but so glad we did. So…it was a bit heavier than expected but manageable. I had to do a lot of reading and I am still learning about the “utilities” and settings and it definitely took some time to get used to. The manual is okay but you will find more on You tube and on the Celestron website for tutorials. Putting the scope together was simple enough. The red dot finder is not great, definitely need to upgrade that if you choose not to purchase the Star Sense Auto Align. More on that later. The 25 mm lens that comes with the scope is actually really good and we pair it with the Barlow lens. The scope arrived in great condition and was packaged nicely. The tripod is decent and easy to adjust. So back to the Auto Align. the first few times we took the scope out we attempted to use the 3-star alignment….never could get it to work correctly….having said that…we live in a light polluted area near Nashville so we expected some issues. After attempting this alignment several times we decided to purchase the Star Sense Auto Align…I know it is fairly pricey but wow, so glad we did!!! The Star Sense aligned the first time and has worked great each time (read my review on that one as well, hopefully it will help if you decide to purchase it). I had never seen the Orion Nebula before and my first early morning viewing was breathtaking! Views of Saturn, the Moon, and Jupiter are fantastic…you can see the Cassini division in Saturn’s rings. Images are clear and detailed. The one thing that I was unaware of when purchasing this scope and only found out after watching some You Tube videos is that you have to upgrade the firmware on the mount….the joy of being a newbie! So things we purchased for this scope that may be of use for someone purchasing it:1. Celestron X-Cel 12 MM lens2. Celestron X-Cel 3x Barlow3. Celestron Oxygen iii Filter4. Baader UHC-S Nebula Filter5. Celestron Solar Filter (8″ for the 8 SE)6. Celestron Lithium Power Tank 12 V (a must have or you will be replacing batteries every 30 minutes)7. Colored filters but mainly Red, Violet, Blue, and a Moon filter…haven’t used the other colors yet. Orion has a great set, although it is expensive.8. A carrying case- we travel a lot….Celestron has one for this tube size, otherwise use the boxes it came in- they work just as great!9. A pelican case for your eyepieces and filters….we purchased one with pullouts and made our own…or you can buy one from Celestron.10. And a must have for those living in the South or colder climates…a dew shield or heater!11. A red flash light or just use the red light on the Lithium Power tank.12. Last but not least….for newbies…there are several companion books you can purchase….The Backyard Astronomer’s Guide, Night Watch, The Total Skywatcher’s Manual, and National Geographic has some great books. We love locating things in the sky, then looking them up and reading about them. The books also contain great tips and suggestions from purchasing eyepieces to filters, and how to best view objects in the night sky.All of these items were purchased on NiceShine and we bought them over time but each purchase has enhanced our viewing and really made our nights out so enjoyable.Pros: So many but to name a few…Great, clear images, mostly newbie friendly- just have to educate yourself on operating the telescope to get the most out of it, a lot of items available for purchase to upgrade your experience, and with the star sense auto align you can spend hours outside enjoying clear skies. Not to say most people cannot get the 3-star alignment, we just lost patience with it and purchased the auto align :-)Cons: Manual not so great…You Tube has great videos from knowledgeable enthusiasts, it seems a bit heavy but manageable for one person. My husband is always with me so portability isn’t an issue but just going out alone it may be somewhat heavy.Overall, I am so happy with this purchase and would recommend it for anyone wanting to add a more advanced telescope to their collection. There are several tutorials available online at Celestron and via You Tube that I encourage you to view. The telescope can be a bit intimidating for those that are new to the hobby but with a little research you will be loving it! We take it out at least 3x per week (skies permitting). The most beautiful site seen was the other morning I went out at 5 am and viewed Venus…the moon, and Orion’s Nebula…so clear and amazing…it was definitely a treasure trove that morning, spent about 90 minutes viewing the sky until the Sun started to come up…very peaceful! We are still learning this telescope and each thing we learn just enhances our experience. I was hesitant on this purchase at first…a lot of money to spend plus accessories but we are so glad we decided to buy it! Definitely do your research to determine which telescope is best for you and your goals but this is a great one for those just entering the hobby or graduating from a starter scope. Now if we could only afford to buy another one of these so my husband and I don’t fight over viewing time!
S.D. Falchetti –
There are over four hundred reviews here for this telescope, so I won’t cover all of the technical details already discussed; instead, I’ll hit on some of the things I still had questions about before buying the Nexstar 8SE.One of the hard things about choosing a telescope is knowing how you want to use it. Whether you want to look at planets (which are super bright) or deep space objects (which are super dim) affects your choice. A scope with tons of magnification from a long focal length may be great for Saturn but have too much zoom for things like the Andromeda Galaxy.Portability is also a factor. Can you carry the entire assembled scope out on to the deck yourself each night, or do you need to spend an hour lugging it out piecemeal, assembling, leveling, and aligning it? Once it’s set up, how easy is it to find objects? If you want to look at Jupiter and the Moon – piece of cake…but what about objects too faint to see with your naked eye? Do you have the time and skill to read star charts under a red light, hunting-and-pecking across the night sky searching for dim fuzzies?Lastly, do you want to take photos of your view? If you want exposures of more than a few seconds, does your mount have a way to compensate for the Earth’s rotation to prevent your stars from blurring to streaks? If you’re taking pictures of big things, like a nebula, will you have to make a mosaic because your scope has too much magnification to fit it all in frame?I thought about all of these, and chose the Nexstar 8SE. It is a great scope and fairly easy to use (although not as easy as Celestron’s “no knowledge of the night sky needed” slogan suggests). Here’s how it fares for my selection criteria:Portability:If hours of free time are needed between setup and gazing, the scope will be relegated to weekend use only. That may not seem bad, but consider that out of those weekends, it’ll further be whittled down to ones with clear nights. So, if I don’t want a scope I can use only once or twice a month, I need something portable. The 8SE weighs 33 lbs fully assembled (and can easily be separated into three lighter components). So, imagine picking up a 16 lb bowling bowl in each hand and walking out onto the deck. If you think you could do that, you can carry the 8SE out. I leave mine fully assembled and just carry it out myself whenever there are clear skies. It takes two minutes. If it’s too heavy, there are three thumb-tightened knobs that quickly separate the tripod from the mount and tube, splitting the weight in half.Type of Astronomy:The 8SE has a 2000 mm focal length and 8″ aperture. 2000 mm is two meters (6.5 feet!) so you’d expect the tube to be at least 6.5 feet long unless it can bend space and time. Turns out, it does – well, not literally – but it’s a Schmidt-Cassegrain telescope so it uses both reflectors and refractors to double-up the light path, resulting in a very short, fat tube that is highly portable. It’s a great “best of both worlds” solution. High focal length (which translates to magnification) for planetary and lunar views and wide aperture (which translates to brightness and detail) for views of dim objects like galaxies. For me, it’s perfect. I can bounce around the night sky seeing all of the planets and everything in the Messier catalog (globular clusters, nebula, and galaxies). The 8SE comes with a diagonal and a single 1.25″ 25mm Plossl eyepiece that is one of my favorite eyepieces for this scope. With it, you will clearly see a small Saturn with its rings and shadows, or the disc of Jupiter with small cloud bands and its four largest moons. Deep-sky objects will be faint, dim cotton balls. Of course, you can increase the magnification by buying additional eyepieces or increase the contrast of DSOs with filters. I have a small refractor scope that uses 1.25″ eyepieces and filters, and all of them are interchangeable with the 8SE.Astrophotography:I think it surprised me that most of those awesome astrophotography pics we’ve seen that look like Hubble telescope photos are taken with cameras or sensors attached to small refractor scopes. They’re all taken on equatorial mounts that are polar aligned, rotating like clockwork to compensate for the Earth’s rotation. The default 8SE cannot do this. It has an alt-az mount, not an EQ. Although it will track an object and keep it centered, it’s just not able to rotate in the direction that the sky does. As a result, the object will spin in place over time, and all the neighboring stars will orbit it, leaving streaks. You can purchase an EQ wedge that tilts the entire mount onto a polar axis but to be honest for the price and added weight of the 15 lb wedge you could just get a Sky Watcher mount and tripod and plop a DSLR with a decent lens on it, taking some nice wide-field long-exposure photos. That being said, short-exposure photography works great on the 8SE. A cheap t-adapter lets me attach my DSLR directly to the back of the scope. I can manage fifteen-second exposures without star trails. I took the attached photo of the Hercules Cluster this way (by the way – for reference – the Hercules cluster does not look like this to your eye in the scope. In the scope, it is a milky cotton ball). So, can you throw a couple of thousand dollars to convert the 8SE into a long-exposure astrophotography scope? Sure – but I would suggest instead using that money to buy a separate, dedicated mount and tripod for DSLR photography.Ease of Finding Objects:First, you can just use the keypad arrows to slew the scope wherever you want without bothering to align it. Line up a star or planet in the red dot finder and just have a look; however, if you want the telescope to find and track it, you’ll have to align it. There are four ways to do this: 1) 3-object auto-align: center the scope on any three bright stars or planets and the controller will plate-solve to figure out what they are. You don’t even need to know or tell it their names; however, every time I tried this, it failed. 2) 2-star auto-align: center the scope on one star and tell the controller what it is, then it picks the second star and you center it. Works sometimes, but the scope has no way of knowing if its chosen star is obstructed (by trees, neighbor’s houses). 3) 2-star manual align: You pick two stars, tell the controller their names, and center them. Always works for me. 4) 1-star manual align: Same as two-star, but less accurate. 5) I know I said there were only four options, but a fifth option is to buy the somewhat-expensive Star Sense accessory, which is a camera that will do all of this for you.I find that the two-star align is accurate for the part of the sky you chose when picking alignment stars, but quickly loses accuracy when you swing to distant parts of the sky. Fortunately, you can pick new alignment stars on-the-fly, so I typically align to the southern sky, see everything I want, then realign to the northern sky. When the alignment is accurate, it’s really great for finding deep space objects. I can look at a dozen DSOs in thirty minutes, where I could look at only two or three if doing it manually. The single review-star I deducted is due to the somewhat endless frustration I have with the GoTo alignment process, and that in general I haven’t been able to just align the scope to the sky, but have to realign to portions of the sky as I look in different areas. One other complaint is that the 8SE’s controller has been upgraded over time (to have a mini-USB connection instead of RS-232), but the telescope’s manual was not updated. The manual still has photos and instructions only for the old controller, including keypad buttons which are in different locations or have different names.So, I think the 8SE hits the Venn-diagram sweet-spot intersection of portability, aperture, and focal length for me, and I’m happy with my purchase and recommend it to others searching for that same intersection.Edit:After six months of use, I’m very happy with this purchase. I’ve bought many accessories, including the Starsense camera (which you’ll appreciate on January nights when the telescope sets itself up while you’re inside drinking tea), a 2″ Luminos eyepiece and diagonal, and a f/6.3 focal reducer. Out of those, the focal reducer was the cheapest but had the most impact. Believe it or not, it’s possible to have too much magnification and being able to halve the scope’s focal length with the twist of a lens is great. I’ve added a photo of the Orion Nebula and Hagrid’s Dragon I took with the focal reducer. I highly recommend it as a first accessory.
Michelle W –
Although I just got this 1 week ago, I am finally up and running. The first thing I had to do is go on Youtube and find out how to “align the finder scope”. THAT IS NUMBER 1. You can do that in the daytime, get it aligned on a telephone pole or another object. Use something with a clear top. Like a telephone pole and not a tree. Then, when you look for the moon or another planet, you will find them easily.I haven’t used it for deep sky objects yet. I have been so excited with the planets and the moon. Saturn, Jupiter, Mars and the moon are the first items, but the views are amazing. Well worth the money and my time. I suggest you go on youtube and research there.I called tech support and was on the line a long time. Then I found a number in Southern California and had a very helpful conversation with that person. However, youtube was the most helpful.
TheDaveL –
This is a very nice ‘scope. I had a Meade of the same size (8″) quite a few years ago, and decided to get back into things. With the advancements of digital cameras and such, photography of the planets is much easier than it used to be…The only fault that I really found was that any adjustment of the focus knob, no matter how light, causes the telescope to shake crazily. The fix for this was getting the focus motor for it (search Celestron focus motor on amazon). With that, things get much easier. No more “touch the focus knob, wait for the shaking to stop, then check to see if you actually DID get focus”… There’s a learning curve, and having a camera to relay what is being seen to a laptop helps IMMENSELY, but it is fully worth it. The only other real option is replacing the mount and/or tripod, which is really spendy.That said, I was able to get GREAT views of the planets Jupiter, Saturn, and Mars with ease. And, I’m in a very light polluted area (well not as bad as some, but not ‘good’ by any means). The tracking and alignment takes some getting used to, but that, too, is to be expected.In all, it is a WONDERFUL device, and is recommended as long as the previously mention caveats are taken into consideration.On a final note: Get a couple of good eye pieces. The collection offered by Celestron with the barlow, colored filters, and 5 eyepieces is OK, but the only ones that I found worth using are the 13mm (to a point) and higher (17mm and 32mm are pretty good!). The really powerful ones (8mm and 6mm) were pretty disappointing both in their eye relief and clarity. So, instead of getting that batch, see about getting a good 12 or 18mm and maybe a larger one (32mm or so) for wider views, and add on a 3x barlow.Hope this helps someone!
Suibor –
I had a Celestron go-to years ago and wanted to get back into astronomy with the Jupiter / Saturn conjunction coming up next month. I also wanted to get into taking pictures. This is the first 8 inch telescope I have had and it definitely catches a ton of light. These pictures were taken on my second night in the driveway, in a large suburb of Houston, TX. I can’t wait to get it out to a dark site within the next week or two. I have been very pleased so far. I did get the GPS unit, which makes it quicker to set up. The tracking is the only thing I have found a little frustrating. That said, I have not done a 3 star align yet, as I have been focused on the planets. I will point out that using solar system align on Jupiter or Saturn does require constant re-centering when on higher magnifications. Even with the tracking, If you don’t stay on top of it, you will lose it and have to go hunting with a smaller eyepiece to get it back. I am hoping that the 3 star align method will track better. In my tight driveway with a two story house looming high on one side and tress on the other, I have not been able to try that method yet. Tracking adjust is probably par for the course, but I did want to point out to anyone that thinks the telescope will keep the selected body in the center of the eyepiece that this has not been my experience. With a smaller eyepiece (25mm) solar system align will keep the planet in the eyepiece for 1 to 3 minutes, so the tracking is useful, it is just not perfect. The quality of everything seems great and the culmination was spot on out of the box.
Larson –
When you see those crisp colorful images of the planets ostensibly taken with this telescope, you must know that all of them were processed with special computer software. It’s a lie, essentially. In reality, what you can actually see through this telescope when you look at the planets are black and white round dots. You can see Saturn with its rings, but it’s very small. I purchased an additional Barlow lense and the kit with different filters and lenses that allow for the biggest magnification possible. Yet even with these powerful lenses when I directed the telescope at a house just a few miles away I could only make out general outlines, so what do you expect when trying to look at Mars that’s located thousands of miles away? You can put a bigger lense and a filter and have perfect viewing conditions, all you will see are just slightly bigger dots. And don’t let some experts tell you that it has anything to do with “collimation” or more expensive lenses or that you’re not doing it right. That’s all BS. The only object you can observe in detail is the Moon, but you can get the same detail with cheaper telescopes and less powerful optics. Because this telescope’s optics and magnification is one of the very best, I don’t see any advantages in owning it if you can obtain the same results with cheaper telescopes. I definitely didn’t intend to and will not be buying any computer software to process the images. I wasn’t interested in photography, just wanted to see the planets and the stars, and was disappointed. Some other cons of this telescope – the red dot which is a finder is way off target and as somebody else mentioned, stopped working pretty quickly. Even if you used their two star or three star finder, it’s very inaccurate. I tried to locate the planets manually, sometimes it works, but sometimes it doesn’t, because they are very small and the image doesn’t appear the way you see it, but inverted and sideways. This telescope is also very bulky, cannot be managed by a kid due to its size and weight, and esthetically not very elegant to look at. So the final verdict is this – do you really need to pay this much money just to look at the moon a few times per month?
Kindle Customer –
I’m sure the telescope optics are great. I still don’t know. However, I GUARENTEE you will not get any of the advances features to work out of the box. Then, after you buy the GPS and star sense and wireless you will find that there are not even enough ports to plug them in. (or even matching port types, or even modern port types, or that the port for the hand controller is even easily accessible). Then you will buy splitters and cables and try to connect them. After you get them connected you will then discover celestron has never hear of plug and play. Something everyone else figured out in the mid 90s. I instantly got a critical error message and the telescope refuses to initialize. This is literally with just the starsense plugged into the AUX port on the telescope base. Then you will try to research the issue online, find nothing useful from celestron, find out you aren’t alone and the are bunches of websites with fixes, work arounds, kludges, etc. Then you will have to update the software. Then you find out the unit uses a serial port with an outdated USB connection. Start over with cables and adapters and connectors. Then you get to download drivers from 3rd party sources to try and get your computer USB cable to behave alike a serial cable. Then….., and Then….., Then some of this…., then just do this…., turn on/off….turn on/off… turn on/ off…then…. I feel like I’m trying to hook something up to a PC back in 1988 were it was board level and jumper switches and every step was pain in the a** and you were most likely met with the blue screen of death as a reward for you efforts. I am a field engineer that works with tech toys, lab equipment, field equipment, etc., and consider myself to have been more familiar with this sort of stuff then most. And I am only trying to get starsense and starsync to work. These are celestron brand accessories made for this machine! What if you want to add wireless, autofocus, and camera? That’s 5 ports required if you don’t want to try daisy chaining this stuff up. There is literally one ONE aux port that is a phone jack on the base. However, they did take the time to put a convinient and accessable autoguide port on a base that has tracking built in. Go Figure. Like i said GOOD LUCK!
Old guy history buff –
Wonderful optics. Main complaints are that, as with any automatic scope, it is hard to find a work around when the scope is not operating properly. A lot of trial and error as the manual is not detailed enough about certain things for beginners(and manuals are for beginners). Also, unplugging and lugging in new controls(like switching original control for starsense control of vice versa very difficult as plug in way in the mount and it if difficult to line up the plug with the hole if you have normal sized fingers(big design flaw that could have been easily fixed).
Laura –
I just received my 2nd Nexstar 8SE (The previous one fell off its mount and shattered the front collector plate) It is a great product and I with the old one I took it down to the University of Arizona mall and set it up outside along with the local Astronomy club and a class that was going on and ended up with a long line of people who wanted to see through it as I had it locked on Jupiter and 5 of its moons. It amazed me that I had people from all over the world standing in thatMy only complaint is that after spending $1400 for this new telescope you’d think it would at least come with a power adapter as did my previous 2 telescopes but not this time.
stashgal –
The reviews for this scope I had read were all positive EXCEPT for the red dot “finder”.In light polluted skies, which are everywhere, the half mirrored glass reduces the brightness of the target star so it’s harder to see against bright polluted skies.Others who had bought this scope said to DUMP THE RED DOT FINDER, IT’S JUNK! Their right, it’s junk.There are NO optics in this finder to brighten the image & make it easier to see, it’s just a naked eye view finder.You will not be able to use it unless you put a SHIM under the rear of it’s mounting plate behind the screws, otherwise, all your attempts to get the red dot to line up with the target will be in vain.The telescope itself is fine.I had the scope all assembled & ready to go, the next job was to align the red dot finder with the scope.The manual told me to start by “using BOTH EYES~”!There I had to stop, I no longer have two eyes!So this fine scope has to gather dust until I can BUY A REAL FINDER SCOPE. I have a Telrad on order, at least with that I only need one eye to use it & I can start using my computerized Celestron next star 8se.The finder SCOPE won’t arrive until late April!Celestron, PLEASE stop putting that useless piece of junk, the red dot “finder” on your fine telescopes, put a real finder SCOPE on it or a Telrad finder.
Well Read in Iowa –
What can I say bigger is better, my wife told me that I spend more time with that telescope than her. It is easy to use right out of the box, easy setup and move. I like to to say Celestron has hit a home run with this model. This product only gets better with more Celestron stuff that you buy with it ie; eyepieces, auto focuser and gps. If you look around you can fine great deals on this telescope but when you find one snap it up has they go off the shelves fast. Great bargain for the money. Thank you Celestron
Pb –
I wanted to love this thing. I sold my 12 inch dobsonian and purchased this one because of the good reviews and go to mount. I saw a bunch of one star reviews from people complaining about the software not working right. They weren’t lying. The three bright object option never worked. Failed every time. Two star auto align would work after a whole bunch of tries, but within a few minutes the calibration was completely off. I would tell the telescope to find Jupiter and it was way, way off from where the plant was. I spent 4-5 hours on three separate nights trying to get it to work. I was doing all the steps right. Watched a bunch of instructional videos online, still didn’t help. So I figured I would update the telescope even though it appeared I had all the updates on telescope computer already. They hadn’t sent me the cord to connect it to the computer. Went to Best Buy and bought one. I spent the better part of a day trying to get the telescope to connect to the computer. I used four different computers. The telescope would show up as being connected on my PC, but wouldn’t connect on the telescope computer end. I read the reviews that tech support was non existent so I didn’t even try. Boxed it up and sent it back. For this price, it should definitely be better than this.The optics of the telescope were great. When you manually found something, it looked great. I saw some reviews that the tripod was flimsy – it’s not. This telescope would be great if it wasn’t for the computer being pure garbage.
Schronanigans –
First – for those who are debating between the 8 or smaller sizes – if you can afford it, get more light.Keep in mind these SCT’s are also losing about 30 percent potential light from the middle of the scope. So the amount of light this X-inch scope gets from a similar X-inch Newtonian design is notably less. And light is… almost everything.So, you can use the technology here with cameras to overcome this by gathering more light for your photos, but your eyeballs can’t do this. So if you like the idea of simply observing deep sky objects, I promise you, you want the 8″, even if you only use it for observing some of the time.A word of advice for those that struggle when they first get the scope. If your tracking does not seem to be working AT ALL, then do the following:1 – Check the direction you put it on the mount. I know that sounds funny, but I did it backwards, and so it literally could never line up. It’s SO dumb in retrospect, and I laugh at myself as I think of the clues I missed back then, but still… I put this here to help others, cause I’ve seen reviews that said things like “it couldn’t even find the moon!”. I know what happened for those people.2 – Get yourself a crosshair eyepiece. Trust me, it makes the alignment MUCH more accurate.3 – if you need any more accuracy, you can tune the gears to better pick up slack. You will need to DuckDuckGo that (I don’t use google, since they are marxists), but you will find plenty of people who can explain that process.There are accessories I think are absolutely worth it, and some that are only mildly helpful. If you are in a city especially, get the dew shield. It’s good even out where I am as a dew shield, but if you were so inclines you can make one yourself.DO get yourself an external battery. If I might be so bold as to suggest, grab this:https://www.amazon.com/gp/product/B00ME3ZH7C/ref=ppx_yo_dt_b_search_asin_title?ie=UTF8&psc=1and use some velcro tape to build a “mount” on the side of the scope for it. You won’t tangle, it has enough charge to last several long nights of observing, and you won’t fight wussy double A batteries. This is pretty much a MUST have, in my opinion. It is revolutionary and compact.If you want to do astrophotography, you it is a must to get the focal reducer. Just trust me on this, you will want it. It’s hard enough even with that, because of how zoomed in you get. If this is your first scope, please keep in mind astrophotagraphy can be hard until you learn all the nuances, and even then, it’s still hard. That’s part of what makes it fun, though, so dive in and enjoy it.Finally, this one is a bit more divisive, but I suggest if you can afford it that you get the 2″ celestron diagonal with the quick release clamps for eye pieces. 2″ boasts much nicer visual experience, even though the celestron will have already cut that size down before you get to the diagonal. In other words, you already did a bending of that light down, but it’s just such a treat to use and I love the 2″ eye pieces. A real joy to use.
Amateur Telescope Maker –
This telescope has renewed and refreshed my interest in amateur astronomy. I had given up on seeing much from my very light polluted back yard (rated Bortle 7) except for bright planets and the Moon. I can barely make out the major stars in the constellations most nights. I use this scope with a Celestron Starsense Auto-align and the Wifi Celestron SkyPortal WiFi Module along with my Galaxy Tab A running the SkySafari app. Hooking up everything and making it all work together was amazingly easy despite the fact that I am an old fuddy-duddy who barely uses a smart phone. Now I can actually look at galaxies, nebulae and double stars things in my backyard! Not to say that they look as good as from a dark sky location. They don’t, unfortunately. Despite the superb optics of the telescope it’s still difficult to make out detail in many deep sky objects. The scope will put the object into the field of view of a low power eyepiece but sometimes you can’t even see it because the object is dim to start with and the light pollution washes it out completely. That is just the unfortunate truth of urban living. Sometimes a light pollution filter is helpful but nothing beats a dark sky.I rate this product as top notch in every way. I am not sure about recommending it to a rank novice living near a city, though. I am very experienced with telescopes and observing astronomical objects. I know that I have to reduce my expectations because of the light pollution of the city. I am not sure a novice could get past that. This telescope has superb optics but I did have to collimate it to get best performance. A novice might find that process, along with others previously mentioned, to be daunting.If you can handle the challenges, and especially if you can get to a dark sky, you will find this scope to be very rewarding. With eight inches of aperture and a remarkably easy computer interface it is a dream come true! Don’t expect too much, though. No matter how superb this instrument is, it cannot give you Hubble images at the eyepiece. But if you keep your expectations moderate, you will be richly rewarded with this telescope system.
JT –
I purchased this telescope when I decided to get into astronomy at my ripe old age of 75. I thought the computerized version of a telescope might be easier than trying to figure out the night sky with a star map or a book. It took some time before figuring out how to align the telescope properly. The local astronomy product store told me it should take 5 minutes…I spent a half hour my first try with no luck. After a week, I was able to align things fairly quickly. The weakest part of this product is the red laser finder scope. The first option I purchased was a better finder. Once aligned, the computer was able to direct the telescope to various objects in the sky. Keep in mind that astronomy is an expensive hobby and upgrading the optics and other accessories for any telescope could easily cost the price of the scope itself. Regardless it is worth the investment. The Celestron customer service team and their online support is excellent. Every time I called or emailed CS I was able to get a quick and professional answer to my inquiries. They made it easy to navigate through all the intricacies of astronomy.
Terry Barnett –
No this isn’t a fancy Dansey Auto Photog rig that weighs 50 pounds and makes you wish you had a pack mule. I am older now and I sold my big rig for that very reason. This scope breaks down into 3 major pieces. It is light but it has Star Bright coatings like my big rig did. I think this was designed just for me, so thank you Celestron. I don’t care if you call it a beginner scope cause I am calling it an ender scope.
Mr. Happy Reviewer –
The picture you see is just me putting my cell phone in the eyepiece to take a picture of the moon. When you look with your eyes, the telescope is clearer than those pictures show. This is truly the best personal telescope I have ever used. You can get more powerful telescopes than this, but they get way more expensive. This is a monster of a telescope, and truly anything bigger than this becomes very difficult to move around and take different places. I’m glad I got this, and I would never get anything bigger than this because it would be an absolute pain to take anywhere.Please understand you will want to add a high quality zoom eyepiece to this, a power supply (at least an AC adapter, but a portable battery would be great too), a dew shield, and a solar filter and a moon filter would be great too. That will allow you to use the telescope closer to its full potential.Yes, this telescope is expensive, and the things you add to it to make it fully functional are also expensive. But the results you get after you do that are unparalleled. This is truly a system that is a joy to use.
WCat –
I love this scope. It deserves 5 stars, but I would knock one-half star off if I could for the following two reasons:1. No power supply. You have to buy 8 AA alkaline batteries to use it at all, and they don’t last more than a few nights of viewing, depending on how much you move the scope around, and how long you have it powered up. At this price, Celestron should include a power supply, whether it is a wall wart or something like a lithium power pack (good units that they do sell separately), even if doing so adds another $20-80 to the sale price. The scope moves more slowly (but not terribly slow), and the hand control backlight is dimmer, when running on the internal batteries. You’ll likely be back on NiceShine again soon after you take delivery, looking for something better than the internal battery setup. My advice is to avoid buying a wall wart unless you have long extension cords or AC outlets very near your intended viewing spot. Instead, spend a few more dollars on a portable lithium battery supply from Celestron or a third party, and you’ll have plenty of power and mobility, too. The scope has an external power socket– the common 5.5mm by 2.1mm bayonet, and it does not need exactly 12 volts DC. It apparently tolerates 11-14.5 volts or maybe a bit more. You can also buy a Celestron cigarette lighter plug, so it should be compatible with standard automotive battery power. In my case, I bought this compact lithium pack and I’m very happy with it: https://www.amazon.com/gp/product/B07YRZYLKV/2. The “Star Pointer” spotting device included with this telescope is OK-ish, but as time passes, you may want to consider an optical finder with some small level of magnification and possibly crosshairs. I’m planning to do this in the near future after my credit card cools off. I’m not a big fan of the Star Pointer. Some people like it, others have said it’s not aligning with the main scope for them. I spent more time fumbling with mine than I did with the rest of the scope. Some of the fumbles were my fault, though. There are a few YouTube videos that show possible solutions if you can’t get your Star Pointer and your telescope to agree with each other. The idea is to add a small shim, like thin cardboard or even a US dime, under the back of the dovetail bracket. Just loosen the two screws and slip the shim under the back, then re-tighten the screws that hold the finder dovetail in place. It gives some extra tilt inward and downward towards the telescope body. If you can’t center the image and it feels like you need to move the red dot down and to the left of the end of travel, you might try this.Celestron has made a very good, solid telescope with super optics. I’m a big fan of the hand control and its built-in ability to help you find great stuff in the sky. It’s first-rate. It’s especially good for novice astronomers, in my opinion, and saves a lot of time that would otherwise be spent searching for things when you’re new to the hobby.If you don’t mind some advice: PLEASE, if this is your first telescope, don’t buy a bunch of extra eyepieces, filters or Barlows just yet. Enjoy the included 25mm eyepiece first. It has plenty of magnification without being too much–and too much is what a lot of newbies (myself included) end up with. If you buy eyepieces that give you greater magnification, you’ll only be frustrated until you get to know your way around. If anything, you’ll get a lot of use out of an eyepiece that even widens your field of view more (lower magnification), like a 32-40mm eyepiece, or even a focal reducer. I have the Celestron f6.3 focal reducer/corrector, and I couldn’t be happier with it.As a last thought, get one of Celestron’s inexpensive, but surprisingly good 7 X 50 binoculars. At 7 times magnification, they are great for viewing the constellations and helping you decide what part of the sky to point your telescope at next! I’m happy I got both. The telescope and the binoculars each add their own level of joy to the night’s experience.Even in a suburban environment with lights all around us, I’m still blown away by how many stars I can see with the binoculars compared to my unaided eyes. And of course, the telescope just makes everything that much closer and brighter.
Daniel –
I bought this scope after having a manual reflector scope fir many years that allowed me to really only see the moon.After attending a lot of astronomy club meetings and talking with a couple guys that do astrophotography, they recommended this scope starting out.Calibration is pretty easy, I have the best luck using the 3 star star align picking 3 stars that are further apart. After that, the go to gets pretty close to the object.This does great for planetary viewing. I have been able to see Saturn, Jupiter and 3 of its moons, close up on the moon and Orion nebula.If you want to get into deep sky astrophotography, you would need a equatorial mount, this one is an alt-az.I do recommend a lens kit to have a variety of eyepieces and a Barlow lens.
Celexi –
I had an 8″ Meade LX-200 many years ago and the NexStar 8SE is MUCH better! It just too me a few minutes to assemble it, and performing the alignment was another 2-3 minutes (I used a solar system alignment). The images are very good; clear and no distortion. Tracking is pretty good; with a good Lat/Long entered from google and a good alignment, it tracked the moon for a couple of hours without getting out of the field of view. I did a couple of photographs using the Celestron YZ3 adapter and they came out very good; crystal clear with excellent detail. I highly recommend getting the AC adapter rather than trying to use batteries; the telescope will go through them very quickly. It is also a bit heavier than I expected from the specs, but still easy to move in two parts; the tripod and the scope/mount.
Luis –
El Celestron Nextstar 8se es uno de los mejores en el mercado. La portabilidad es dudosa ya que es bastante grande. Como sea se puede desmontar y llevar a cualquier lugar. No lo recomendaria que lo desmontaran y montaran pq se podria romper si se cae o no se maneja con cuidado. Podria ser bueno para principiantes pero tendrias que tener algo de conocimiento de astronomia para sacarle el mejor provecho. No viene con ningun tipo de programa para computadora y solo trae un lente. Para ser tan caro debian incluir al menos otro lente de mayor potencia. Solo viene con el de 25. Recuerda mayor el numero menor la potencia. Menor el numero mayor la potencia. Le compre el kit aparte con los lentes y filtros de colores para los planetas.
Jerry Whitehead –
Putting the pieces together is easy, you need to buy the required ax power supply or battery power supply as neither come with it and you WILL NEED ONE OR THE OTHER. The views are awesome but you will want better eyepieces than the one that comes with it. And be prepared to be frustrated when you are learning the alignment, the ad says “just point ant the three brightest stars in the sky and your aligned” that is horse poop, it’s a bit more involved than that but overall it is a good telescope just don’t be fooled by the ads
Gman –
Bought this as an upgrade to the 5SE, which remains a perfect grab-and-go option. I’m used to the GoTo functionality, and there is a bit of a learning curve to these, but once you get it you’re set. I continue to have great experiences with Warehouse Deals — this was advertised as Used Acceptable, and I swear it was never removed from the box. Small collimation adjustment was needed, otherwise perfect. Unbeatable value.
Carlo Barlo –
Pros: Good optics, solid mount and base, quality materialsCons: Sighting scope could be better, should get two eyepieces instead of just one, eats batteries fast a bit heavy for older usersI have used this scope twice now, have seen Jupiter, Mars, Orion Nebula Sirius and the moon, all beautiful and sharp imaging. Focuser is good, I didn’t have any of the issues some reviewers had. Tripod is very solid. I have to say I have not aligned it yet and used the computer features but it seems pretty cut and dry, my advice is to watch some YouTube videos before you try it. There are many good ones. Also, since this scope is heavy on the power requirements, you might want to get a good rechargeable external battery. The scope is a little bulkier than I expected, but its solid and if you get a good grip on it its easy to transport. I took it up and down 3 flights of stairs fairly easily. Scope came well packaged, although there was a ding on the exterior cardboard box, but no apparent damage. The red dot sighting scope is kind of cheapo, but adequate, even so, you will probably want to invest in a telrad sight. All in all a very decent scope overall. Happy with the purchase. Looking forward to a lot of nights of stargazing!
Sonia R. –
I been able to view the moon and it’s craters, but I have to manually look for it which takes effort since it’s really zoomed in. I bought a reduction lens that is recommended, it didn’t help. I have not been able to focus on anything. The finder scope is crap and if you want to use the control you have to be setting your location, country, state, city, time zone and date. This is nothing like a beginners scope where you point and you’re able to see the planet or star from afar. It’s like really zoomed in that if you are dead center on the planet you won’t know it. A full moon can blind you. This is not an easy telescope, you need lots of patience and strength to be able to move around and adjusting the tripod level. I am an amateur and have been using a smaller scope and regular binoculars and night vision binoculars and wanted more focus. I am bummed out. It was over $1,500 not well spent.
BookWorm –
Very nice scope! Does what it’s suppose to do!
Chandler Sowden –
Celestron has always produced superior products, as is this one. The computer control makes it easy to find objects in the sky, but it requires a lot of setup. The tripod must be carefully leveled before attaching the telescope, then you must enter the actual time and date, then find up to 3 stars to get it lined up.Also, the manual was written in 2006, and the directions differ in some areas with the hardware. However, they did include a 2016 update that covers most of the differences. But I’m definitely happy with my purchase.
Picky Viki –
This is my 3rd attempt at this telescope. Order one was from NiceShine, out of collimation out of the box, but worked for a days before realizing that the adjustment screws were stripped, one doing nothing, and there were shavings in the tube. Returned/refunded and repurchased with G&W being the seller. Sent a open box item as new. Didn’t even try, sent it right back. Picked adorama for seller 3 and received a new new telescope. Have a 130slt so I know the alignment issues using the goto software. Only choose solar system align or 2 star. Bucked in on Saturn, spun to the moon and aligned solar system using the moon. Electronically slew to Andromeda and immediately back to Saturn … well within the eyepiece. Works like a charm. There is ALOT of adjustment in the focuser, so if you can’t see right away take a few mins to dial it in. I think there are 70turns each way.
Michael Moore –
I’ve been looking at this telescope for awhile. NiceShine had it discounted almost 500$. I couldn’t pass up the deal and I’m glad I didn’t. This is the kind of telescope I have wanted since I was a kid. Just hate I had to wait 50 years to get one. I love this thing!!!
Lennert M. –
Received the SCT about 3 months ago at an awesome price. I have seen this telescope priced at $2K but I got it for $1200.00. Very few accessories included but from the savings on the scope, you can add in some accessories like a F/6.3 focal reducer, 60 mm finder scope from Svbony and a set of 1.25″ polossi eyepieces and filters. Was able to auto-align and view planets, Jupiter, Saturn, Neptune, Venus. I was able to view the Andromeda galaxy and the Orion nebula using the focal reducer. Looking forward to expanding my knowledge of the night sky and sharing them with friends and family.
Jason Mulek –
This is just amazing. I have always wanted a more serious telescope and this thing ROCKS! The Nexstar hand controller took a little time to get used to and how to align the telescope – but once that was figured out its shocking how simple it is. I was overthinking it BIGTIME.This is a really amazing telescope. I have seen so much of the night sky and my kids love it.
John K. Roberts –
I ordered my Celestron telescope on Oct. 19th 2023, to arrive on Oct 25th.It shipped by UPS from Pennsylvania to Richmond, VA, then to Jacksonville, FL (Note: I live in Florida). After 2 days in Florida, it was flown to San Pablo, California and eventually to UPS’s main hub in Louisville, Ky.From Kentucky it was flown to Orlando and trucked to Leesburg, FL and then shipped to me (a week late) on Nov. 1st.One of the motors in the arm did not work (making the telescope worthless) so I contacted Celestron, who sent me a UPS sticker to put on it for shipping.I took it to a UPS store on Saturday morning Nov. 4th at 10:00 am.The package was picked up on Nov. 6th to be shipped to California for repair. It went “Ground” to California and was received 8 days later on Nov 13th.After being told that all items would be “looked at” in the order they were received, implying “they were in no hurry”, I replied to them in a less than favorable response.In two hours I received an email from them that they had opened my package, inspected and tested it, took it apart, removed the defective motor, replaced the motor, reassembled the unit, performed numerous checks and shipped it via UPS Ground. (ANOTHER TRIP ACROSS THE COUNTRY)Proposed delivery date is Nov.21 (over a month after the order date)Bottom Line: I ordered my telescope in October to use in the pitch-blackness of Oklahoma Cattle-Country, when I am there for Thanksgiving week.I will leave on Monday Nov 20th, for Oklahoma, so will not be home in Florida to receive the Telescope, or be able to use it.As far as the telescope goes, It will have crossed the country 4 times, two of them by truck.To say I am not pleased with the LONG process would be an understatement.
Brion Pellarin –
I love the actual scope. The mount and tripod are slightly underpowered. Alignment process can be frustrating at times when you align 3 stars but the alignment fails or the scope points to the wrong place. Do a two star alignment and confirm with the first star.
Jessie –
I’ve always wanted to get into astrophotography and I finally decided to get serious and do it about a year ago. I had no idea what I was doing and so I choose this scope to be my first serious one. While I recommend this scope and mount for casual viewing, I cannot recommend this for astrophotography. There are just too many slight imperfections in the lenses and the mount NEEDS to be an equatorial. I’ve gotten some really good images with this but it is also with a new mount, focal reducer, ASI, Focuser, Dew heaters, etc (you get the point). Knowing what I know now, I would have went with a little smaller, high quality refractor or the RASA/HD version of this. But if you want something to set up in the backyard for the kids to look at the planets and moon, then this is perfect. Ultimately though, I wish that I would have went another route. The mount is really the main priority.
Luke –
I am having trouble connecting my Celestron Nexstar 8SE to my laptop which is running Windows 11. I installed the prolific driver and CPWI and the firmware updater CFM. I could not get them to communicate with the handset which I attached to the computer with a USB cable. I reinstalled the Prolific Driver (PL23XX_M_LongoDriver_Setup_408_20220725), and CPWI. It still did not work.I downloaded CFM updater again and ran the CFM Jar file. It says that it recognizes the USB ports on the computer but that the telescope is not connected. I get the same message in CPWI (Celestron’s telescope software).I followed the suggestion in the firmware update CFM: I turned off my telescope and plugged the hand controller into the computer. The hand controller says ” Verifying packages” then initialize. I turn on the telescope power while holding down the Celestron button and #7. The hand controller says “Menu Tracking” not ” Bootloader” as it is supposed to.So neither the CFM nor the CPWI can communicate with the hand controller.Could something be wrong with the hand controller?When I turn on the telescope with the hand controller only plugged in, it seems to work fine.Has anyone else who has purchased this unit experiencing similar issues?Any suggestions to solve this?
Julianne Leary Cardello –
This is my first real telescope. I’ve tried others that didn’t have a go-to mount and finding objects took a lot of time so I never got a lot of use out of them. This one is super easy to setup and get going. The picture of Jupiter was only about 2 minutes of use with a ZWO ASI224MC camera. It was my first ever picture, so I know with more practice and better seeing conditions it will only get better. I highly recommend this scope.
NiceShine Customer –
The scope is excellent for use by others than beginners. The item weighs 40-45 pounds, too heavy for me to use at the age of 79. Like I said, it is a marvelous telescope and would give a novice user a lot of fun. I never received help from Tech Support for I didn’t call them, but NiceShine was very gracious of allowing me to return the scope due to its heaviness for me to use. It is a great piece of manufacturing.
Mariano Corral –
Excellent scope, but not for beginners.It takes time to use all features and adjust. I bought the case to transport it and take with me on week-end trips.Once you have it setup, know how to use it, then the rest is easy. But it took me 2 months on and off to fully understand its capabilities. But it is a great product. You Tube has excellent video instructions by folks that have it.Maybe I am slow. Ok. But eventually I got there.
Be Cause –
The scope is exactly what an entry level star gazer needs! Easy to setup, well packaged and simple to use. The mount, like many other users have said is a bit Shakey for the tube, but it’s not so bad and easily manageable. The go-to function is easy to calibrate, quickly finding locations and stars. Celestron also sells a Wi-fi adaptor that i recommend adding. It makes interface compatible with your phone.- Weight is more than manage.- Optics are bright- Go-to functions with easeThe only downside: The 25mm eye piece is very basic and not good for DPO.
P. Pizzonia –
I ordered the acceptable used NiceShine warehouse version of the 8se. It’s basically brand new . Looks great works and works great. Saved a buncha money and this telescope is amazing. Worth it!
Elvin Mirzayev –
I just used this telescope to view moon and I was astonished by the view. Very clear and sharp view of the moon and its craters.
NiceShine Customer –
I once dabbled in astronomy years ago and was inclined to get back into it, but with something a bit better than the 4.5in. reflector of years past. I thought I’d give the Celestron 8SE a go. A decent size telescope with a long focal length for higher magnification. The 8SE certainly exceeded my expectations. The GoTo feature of the mount is awesome and makes visual astronomy very enjoyable. Not to mention the whole setup is light, and easily transported by one person. This telescope comes with a 25mm Plossel and is a good all around eyepiece, but you should do your research and get a few other eyepieces, at least one lower magnification and one higher. Word to the wise, research is key on eyepieces. They are what will make or break your viewing experience, and try not to skimp too much on what you get. Cheap eyepieces will make a really good telescope seem like total trash.But back to this Nexstar 8SE, I am pleased very much with this telescope and the features that came with the mount/tripod. However, me being me, I realized I needed more capabilities out of the mount/tripod than they could deliver. Why, because I soon discovered after getting the Nexstar 8SE I wanted to start doing astrophotography. Although the supplied mount/tripod could do VERY limited imaging, with the correct equipment, it would never perform to the level I knew I wanted to go. With that being said, if you are inclined to get into astrophotography I strongly recommend you consider other options. At the time of this review I have subsequently purchased a guide scope and guide camera and mounted them to the 8SE telescope. I have also purchased the Celestron AVX mount/tripod to replace the ALT/AZ mount and tripod that came with the 8SE and am loving the images I am capturing with it on a ZWO 585MC PRO dedicated astronomy camera. Yet I have much to learn and improve upon when it comes to astrophotography. But all in all I am very pleased with with the Nexstar 8SE. As a matter of fact, since tomorrow night isn’t going to be favorable for astrophotography I plan to put the 8SE back on the alt/AZ mount it came with and just do visual astronomy and have some friends over to introduce them to it.
Payton A. Richardson –
The Celestron NexStar 8SE is a well-regarded telescope offering excellent performance with its 8-inch aperture. Its computerized GoTo mount simplifies locating and tracking celestial objects, making it user-friendly for both beginners and experienced users. The telescope delivers sharp, detailed views and is relatively portable. However, initial setup and alignment can be challenging, and its size may be cumbersome for frequent transport. Overall, it’s a solid choice for those seeking a balance of technology and optical quality in amateur astronomy.
Clint Frank –
Best money can buy.
JZ in CA –
I actually ordered this telescope twice from NiceShine. The first delivery was sent in a badly beaten up box, that indicated it was both dropped at some point, and had something heavy dropped upon it. Foolishly I accepted the delivery and found that the optics were badly out of collimation and the focus nob was hard to turn – so returned it the next day and received a quick refund. During the initial checkout, I also experienced some problems cycling through different input screens with the handset, but wrote off my concerns as due to unfamiliarity with their computer program. Unfortunately, when my second delivery arrived, I found that this model of telescope was fraught with serious issues, particularly centering around the handset device (during my shopping phase, I chose to believe the 4&5 star reviews over the 1&2 star reviews – big mistake!). In my estimation the telescope rates 5 stars for the optical hardware (when not dropped during transit), and one star for the handset and computerized drive control. Good luck to anyone who tries to get this telescope to align properly, or accept tracking requests from Celestron’s antiquated handset – especially when the outside temperature dips below 60 degrees F. I won’t go into all the gory details but recommend that prospective buyers first read through the lengthy 1 & 2 star reviews from other suckers like myself who fought to make the problematic built in computer system and motorized drive features work. They don’t. Maybe this was advanced technology when Celestron first introduced the NexStar 8SE in 2006, but this is now 2024 and Celestron doesn’t seem to have done anything to address and fix their handset problems since. I decided I’d better give up and return the telescope for the second time when I learned that I needed to buy a hand warmer for the handset in order for the readout to keep from scrambling lines of text in cool weather. Since Celestron is the only player left making wide aperture telescopes for the amateur astronomer, I have little choice but to pay more for a newer version of the 8” Schmidt-Cassegrain design, like their CPC 8 series. But given my poor experience with the 800se, I’m nervous about spending a lot more money on their products. My only recommendation to perspective buyers of the 800se is to make sure you don’t destroy the original shipping boxes your telescope arrives in, since there’s a strong likelihood you’ll be disappointed with the product and want to return it. Especially when you consider how many of their “new” shipments are just re-packaged items from reviewers like me that rated their product only 1-3 stars,
NiceShine Customer –
I had the 4 inch for years and wanted to trade up–looked and studied for months different brands different sizes-price etc. Went with the eight based on everything.
Andrew Newcomb –
Box came with “telescope “ written all over it. Surprising my wife is hard enough so spending this amount and having this happen is pretty disappointing.After three months of constant frustration, I am out. You need a roadie to help set it up. I am not a clumsy person and feel like there are 100 ways to make a mistake and damage it. Cords, wide tripod legs, drops , etc. Another person on here wrote a super accurate review that I wish I had listened to. The hand control is like the original car phones. The technology is ancient. The setup on the handset requires you to slowly read scrolling lines of text and EVERY time you use it you have to reprogram your location, date and time. Even antique cars have clocks that don’t need to be reset. It is actually embarrassing. First use, I installed eight fresh batteries. They lasted all of thirty minutes and of course died right after I was getting some momentum. It is shameful that the lithium battery pack is not included.Aligning the scope requires you to already know more about astronomy than you do because you have to “find” three stars in the sky. We used a space app but still couldn’t be sure.The instructions are lengthy and confusing.I eventually broke down and bought the wifi module and even after receiving it, I don’t think it auto-aligns like I thought. Doesn’t matter anyway because it stopped working after 60 seconds. It was connected and slewing and then died. No LEDs or anything.I am sure the optics are of good quality but there are just too many obstacles to overcome.I had to ship it back to the manufacturer for some repairs (my fault) and it took a while but the worst thing is I was out another $300 for shipping. They have no UPS corporate account so no special rate.The product is highly rated and Celestron seems to dominate the NiceShine store but it is just not for me. I am disappointed because it was a Christmas gift for my wife and the objects we could have seen looked awesome.
Billysal –
The product is beautiful but it’s too big and confusing for me
Jeremy Curtis –
I received this telescope put it together following all instructions and when it came time to align you turn on the finderscope and nothing. Took off changed battery turned back on nothing. Called Celestron only to be told none available at least to the end of January. Then wait to receive finderscope replacement hoping it will work. Now I’ll just send it back and go with another company. Bad customer service no other option even offered.
Joseph Carrabis –
I got my first telescope – a 2.4″ Tasco – when I was thirteen years old (late 1960s) and it stayed with me through college. Life and work got in the way so it stayed in its case until the early 1990s when I upgraded to a 10″ Meade Cassegrain with equatorial mount. Got the full package and managed to place some photographs with magazines (back in the days of print). I share this up front so you’ll know I’ve been around and used scopes for quite a while.I received a Celestron NexStar 8se package with 14 piece accessory kit and SkyPortal Wifi Adapter for Christmas less than a month ago, and the only way to do this review justice is to provide a play by play.Day 1:It arrives.I’m not sure why delivery drivers leave 2oz packages by the garage door and place packages you need a derrick to lift blocking the front door so you can’t get out to get the package. The 8se comes in a BIG, HEAVY box (SENIORS PAY ATTENTION!).Unpacking.Open the outer box, open the inner box, and you’re presented with four more boxes, some of which have even smaller boxes inside. There are instructions (not completely useless, not really helpful) which provide clues regarding which box to open first. If you love mysteries, you’re going to love this.Quick Set-up GuideFirst, have the Instruction Manual handy and refer to it often. If nothing else, the pictures in the Quick Set-up Guide and Instruction Manual provide clues as to how things are suppose to work. When in doubt with the Set-up Guide, check with the Instruction Manual and vice-versa. Neither tells the complete story and each have different errors.Steps 1-5 GoodStep 6 – First thing, our tripod didn’t have a bubble. Looked and looked and looked and no bubble, no bubble, no bubble. Finally used the one from the Meade.Second, The tripod bubble level’s only useful if you never plan on moving the telescope-tripod assembly from wherever you do your initial assembly. Move it outside, front yard to backyard, beach to desert, field to forest, and you need to take the mounting platform off the tripod to level it all over again.Note this: If you take off the mounting platform, the telescope comes with it unless you separate the scope from the mounting platform.Steps 14-15 – Yes, we’re skipping. Steps 14-15 is where you put eight AA batteries in the mounting platform. Videos indicate this is easy. (SENIORS PAY ATTENTION) It isn’t. You’ll need strong fingers, strong nails, or a screwdriver to pop it off. Put these batteries in now because you’ll have to work under or around the telescope if you wait until Steps 14-15 is suppose to occur.Further note – a fresh pack of batteries gives good use for ~30m then fades rapidly, especially if you’re using the scope in winter (15-30ºF). We planned on getting the rechargeable power supply and ended up returning the entire unit and all accessories because, personally, I don’t need the headaches.Step 7 – Notice in the picture the demonstrator’s holding the scope and mounting platform together? The hitch here is they didn’t include the step where you attach the scope to the mounting platform.The hitch with that missing step is you can’t attach the scope to the mounting platform as the platform is configured coming out of the boxThe hitch there is you need to turn the mounting platform part that the scope slides into so you can slide the scope into it.The hitch there is it doesn’t turn easy and, if you’re like me, you’re leery of turning something with a relatively precision motor attached. We called tech support. Turns out the mounting platform part is on a friction clutch and can be turned by hand. Really? (SENIORS PAY ATTENTION) This doesn’t turn easy for people with a good grip, and next to impossibly if you have arthritis.Not to mention turning a precision gearing mechanism with a friction clutch by hand. Nobody told the engineers that’s a perfect way to ruin the clutch assembly?Steps 8-13 – GoodSteps 16-18 – Only useful if you plan on terrestrial viewing or know astrogation well enough to “point-and-shoot.”Now we get to “Before you can begin observing, you must setup your hand control, align your finderscope and align your telescope. Step by step instructions are included in the following Hand Control Setup section.”I’d already spent 2+ hours going through the various documentation (the Instruction Manual is a must), so figuring out the Hand Control Guide is the next day’s job.Day 2:Aligning the finderscope and telescope. Before anything else, remember you have to mount the finderscope to the telescope to align them. Does anybody writing documentation know how to explain something step by step and explicitly? Remember those college science texts which showed step 1 and 2 then the solution and in between had “The derivation is left as an exercise for the student”? They may as well have had “And then a miracle happened!”Anyway, the people who wrote “The derivation is left as an exercise” also wrote the Celestron documentation.Got the finderscope attached. Now I had to find something ~1/4 mile away to properly align the finderscope to the telescope. Which meant taking the telescope, the mount, and tripod somewhere where I could clearly see a steady, non-moving terrestrial object which was ~1/4 mile away. Do you live in a suburban neighborhood? I ended up using a neighbor’s window casing two streets away.Fair enough, but your suppose to get your target in the center of the finderscope which has no crosshairs so you have to be looking through the finderscope dead on while you make adjustments. (SENIORS TAKE NOTE) This can be straining if you have back problems and are 6′ tall or more as you have to bend over to see dead on, and the moment to touch the adjustments the entire assembly jiggles so you have to wait for it to quell before making your next adjustment.Once you’ve got it in the finderscope, move on to the main scope, again with the “center,” which again means you have to be viewing dead on.Yeah, I wasn’t having fun yet.Hand Control Guide:First, does it work? Yes.Second, could it work better? Definitely.Third, does it work as simply and as easily as the documentation and videos indicate? No way, period!The menu system is extensive. It’s also ONE LINE at a time on a horizontally scrolling LED display. Really? In 2025? Okay, chock this up to not getting the flying car I was promised, too.I had to work through the menus four times before I worked it properly. Now onto finding a bright sky object, center it in your finderscope, center it in your main scope, press this, press that, lather-rinse-repeat three times.The first night out I went through that menu system and found three objects three times over and each time got an alignment failed message.Okay, enough for one night. Bring everything inside and start again tomorrow.Day 3:I downloaded two pieces of software available from Celestron, CPWI and Starry Night. I installed and uninstalled Starry Night five or so times. Each time, despite reporting a successful install, Starry Night threw errors faster than I could dismiss them during loading.CPWI installed and loaded, and that leads us to the SkyPortal WiFi adapter module. It worked fine in “direct” mode, meaning it connected to the laptop and I could communicate with the telescope provided laptop and ‘scope where within 5-15’ of each other. However, it never worked with in wifi network mode, meaning I couldn’t sit in my backroom, indicate what I wanted to view, and have that info sent to the ‘scope in my driveway about 30′ away even though the distance from each point to the router was less than 15’.The CPWI software lets you align your scope.Okay, and mine didn’t. It couldn’t find anything it suggested as an alignment point. The suggested points where in the sky, simply not where the CPWI software indicated they should be.The Hand Control alignment needs to be repeated each time you set up the scope. Say what? I have to go through a 15-20m procedure each time I want to look at something? The CPWI lets you save an alignment setting. Trouble there is it never aligned my ‘scope properly.Days 3-15:I took the ‘scope out nightly for about two weeks and repeatedly failed. I contacted Celestron for guidance and was on hold long enough for the sun to go nova. I emailed with my concerns. They sent me pages from the manuals.Day 16:I packed up the ‘scope and returned it.By the way, during the repacking process I found the bubble level. About the size of a dime, and stuck in some bubble wrap.
NiceShine Customer –
Hi guys, I bought one and it is stuck on the “application starting”. Can someone help me with this?
Michael Heger –
Unless you really know what you are doing, this telescope is difficult to align. Even when it says it’s aligned it isn’t. Have to restart alignment if it fails which is a process. Even pointing directly at stars, planets or moon, objects appear too small or not in focus. Definitely not for beginners. If I could return I would.
The practical NiceShineer –
Total garbage. The telescope shipped with incomplete parts. Seller wants me to keep a telescope (and partially refund me a paltry 145) when the telescope cannot be used!!! For being the top rated telescope Celestron absolutely sucks at customer service and fails to be responsive for their lack of quality control.Do not by anyway buy this telescope or any telescope from them.
DAN Y –
This review is from the perspective of someone who is focusing on Electronically Assisted Astronomy (EAA). At the time of this review I have used this scope and accessories for 2.5 months. Pros: The optical tube and mount are well made. The assembly instructions were good. At times is useful for finding objects. Cons: For EAA the tracking is poor/bad. The CPWI software is unstable especially when used with the Celestron Star Sense Autoguider (Tried this on 4 different Windows 10/11 computers). The Celestron help desk I rate as poor for this type of problem. Example: I initially set the scope to stop it from wrapping the cords. After a firmware update, CPWI wrapped the cords during an auto-alignment (using Celestron’s SSAG) and broke the power cord connector (w/in a month of buying the scope). I opened a ticket with Celestron. Their help desk asked for pictures which I then sent. Their next response said the ticket was closed (?) and then responded with a link for me to order a new part (which is still out of stock) w/out offering to send a new part. In Googling this problem someone mentioned that the Celestron firmware update can turn the wrapping feature off, so that makes this problem not due to anything I did (the scope was auto-aligning when it broke). I have dealt with their help desk on another problem and again mark them as bad. I don’t want to totally trash this product/company, but my rating reflects my experience with this product and company at this time. For anyone who is seriously considering getting into EAA, please do more research than I did. Your money will better spent in the end than mine has with this product line.
bruce gray –
This is the worst purchase I ever made. Disappointed me on the get go and I bought every upgrade it had and still could not use it like it says it’s good for. Hoped to take some good pictures, but haven’t even been able to track and take a good time lapse shot. Don’t buy this scope. It’s hard to use and does not deliver what it claims
U’ilani –
Quality amateur telescope. I upgraded from a 6” Orion reflector and the optics of the Celestron are far superior.
Doug –
Labeled as “Like New”. Has huge dent in the tube and the tripod does not lock in position. The battery cover was speared by a locating lug and has a round hole in it now. Definitely not “Like New”.