Login
Register
Shopping cart (0)
Subtotal: $0.00
Spend $3,050.00 to get free shipping
Congratulations! You've got free shipping.
We have imported template successfully. To setup it in the correct way please, save this page, refresh and select it in dropdown.
Reflector Telescope
Brand:
14 people are viewing this product right now
$599.00
Shipping calculated at checkout.
Have any Questions?
Feel free to Get in touch
Guarantee Safe and Secure Payment Checkout
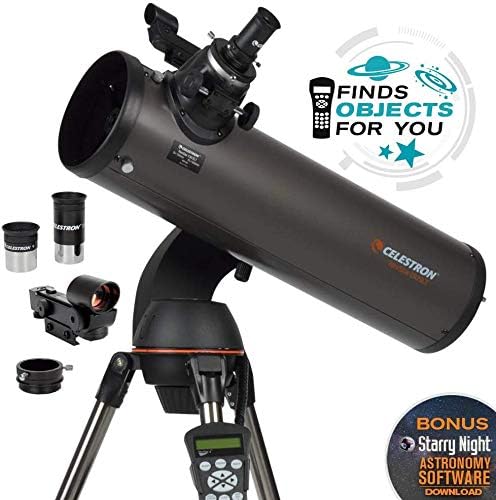
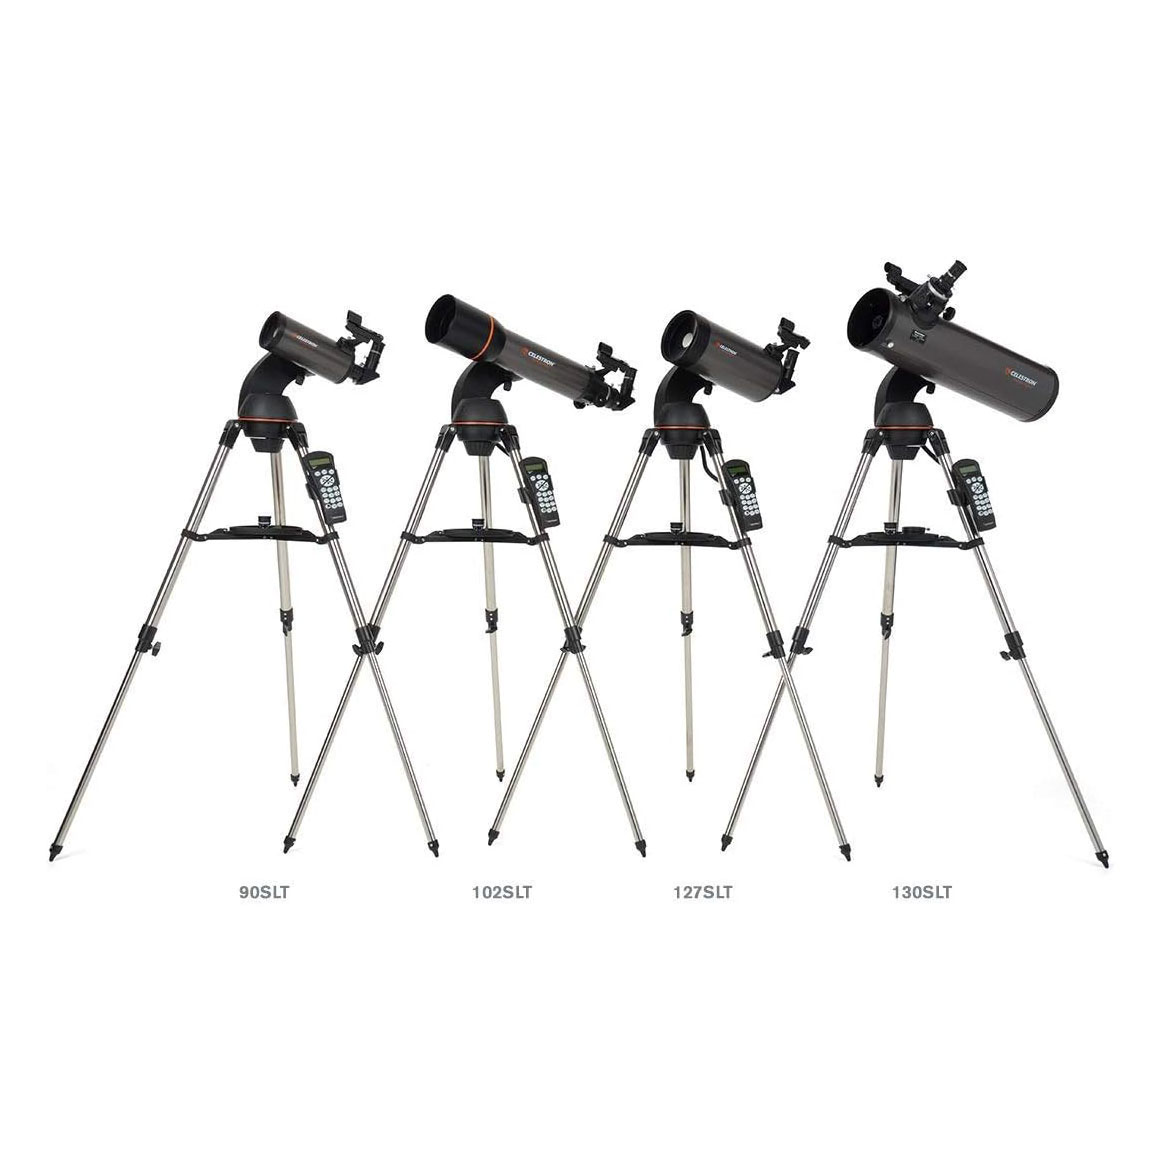
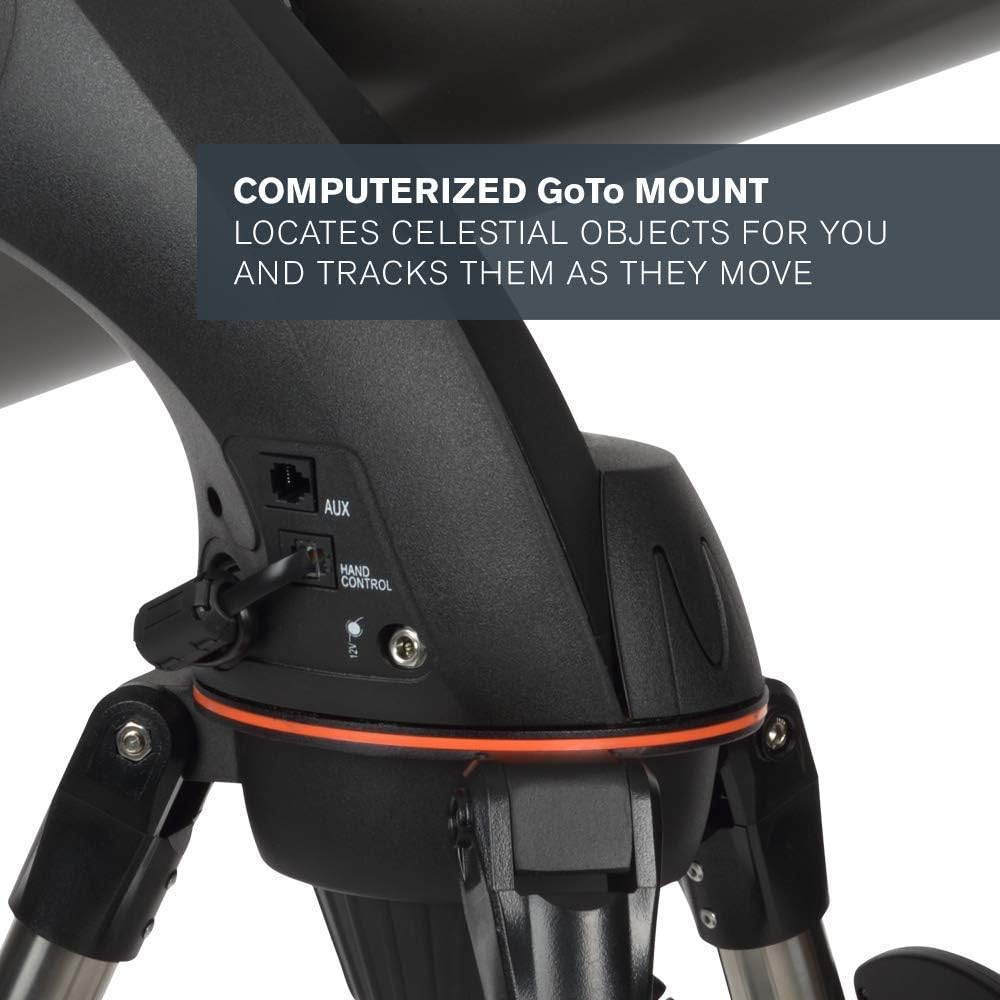
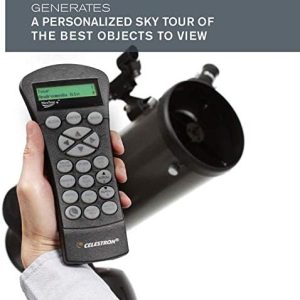
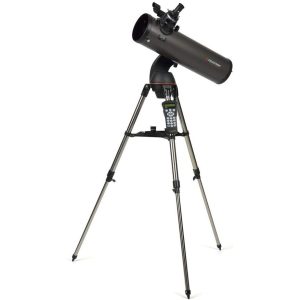
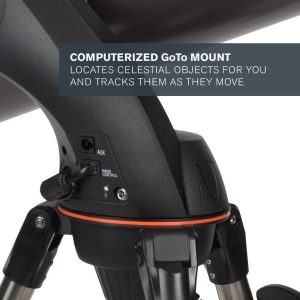
Building on the popularity of our NexStar 114SLT telescope, the 130SLT by Celestron inspires us to go bigger, with 30% more light-gathering power than our 114mm telescope. The Celestron NexStar 130SLT is a computerized telescope that offers a database of more than 4,000 stars, galaxies, nebulae, and more.
The telescope locates your object with pinpoint accuracy and tracks it. At the heart of the telescope’s Newtonian reflector optical design, a large 130mm primary mirror gives fully color-corrected views ideal for astronomical use.
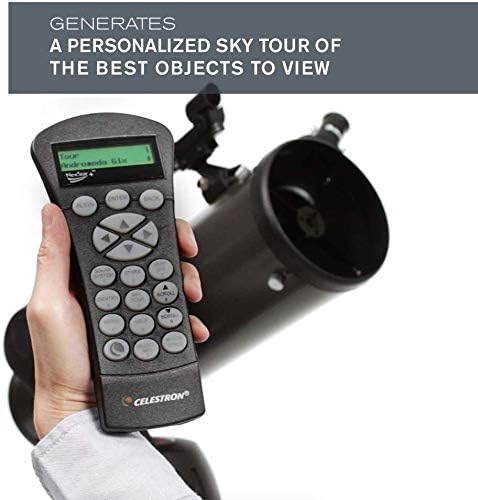
The 130SLT comes with a fully computerized NexStar+ hand control. The computerized hand control gives you the ability to automatically slew to any of its 4,000+ objects, including over 600 galaxies, 300 clusters, and dozens of beautiful binary stars. This telescope for adults and kids to be used together is ideal for weekend camping trips or excursions to dark sky sites. Its compact form factor makes it easy to transport and assemble just about anywhere.
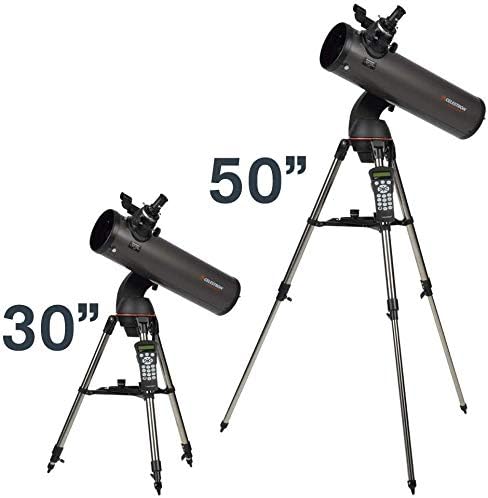
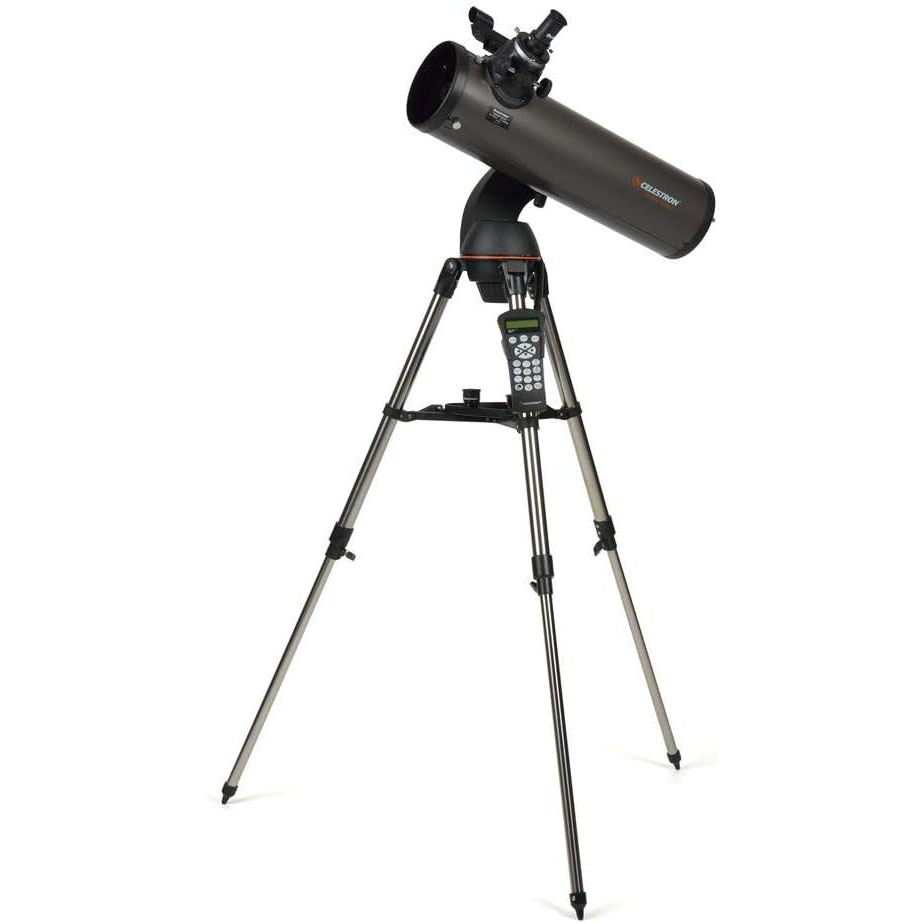
With its pre-assembled, adjustable steel tripod, the NexStar 130SLT can be up and ready to use in a matter of minutes. Our SkyAlign alignment technology and the included StarPointer Finderscope with a red LED make aligning a breeze. Simply center any three bright objects in the eyepiece and the NexStar SLT aligns to the night sky, ready to locate thousands of objects. The NexStar 130SLT Computerized GoTo Telescope also includes a free download of our Starry Night Basic Edition astronomy software for an interactive sky simulation.
The power of this computerized telescope allows you to view the details of the lunar surface, the rings of Saturn, the polar ice caps on Mars, the cloud belts on Jupiter, and a number of the Messier objects, such as the globular cluster in Hercules (M13) or the Great Nebula in Orion (M42).
Explore some of the fainter Messier objects using the additional light-gathering capabilities of the 130SLT’s five-inch primary mirror. Buy with confidence from the world’s #1 telescope brand, based in California since 1960. You’ll also receive a two-year warranty and unlimited access to technical support from our team of US-based experts.
- COMPUTERIZED STAR LOCATING TELESCOPE: The Celestron NexStar 130SLT is a computerized telescope that offers a database of more than 4,000 stars, galaxies, nebulae, and more. The telescope locates your object with pinpoint accuracy and tracks it. Compatible with 2 inch eyepieces
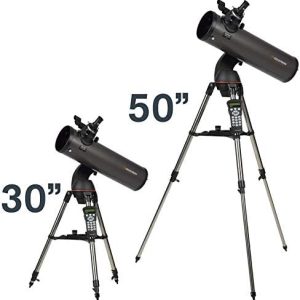
- COMPACT AND PORTABLE: This telescope for adults and kids to be used together is ideal for weekend camping trips or excursions to dark sky sites. Its compact form factor makes it easy to transport and assemble just about anywhere.
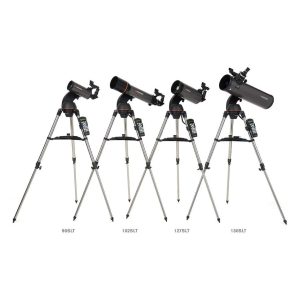
- NEWTONIAN REFLECTOR OPTICAL DESIGN: The NexStar 130SLT is the largest in the SLT family. The 130mm aperture gathers enough light to see our Solar System and beyond. View Saturn’s rings, Jupiter’s cloud bands, and the Moon in brilliant detail.
- BONUS FREE STARRY NIGHT SOFTWARE: The NexStar 130SLT Computerized Telescope includes a FREE download of one of the top consumer rated astronomy software programs for an interactive sky simulation.
- UNBEATABLE WARRANTY AND CUSTOMER SUPPORT: Buy with confidence from the world’s telescope brand, based in California since 1960. You’ll also receive a two-year warranty and unlimited access to technical support from our team of US-based experts.
| Eye Piece Lens Description | 20mm and 9mm eyepiece |
|---|---|
| Mount | Altazimuth Mount |
| Focus Type | Manual Focus |
| Power Source | Battery Powered |
| Finderscope | StarPointer™ red-dot finderscope |
| Compatible Devices | [Celestron Accessories] |
| Number of Batteries | 1 Lithium Metal batteries required. (included) |
| Coating | Aluminum |
| Focal Length Description | 650 millimeters |
| Field Of View | 6.3 Inches |
| Dawes Limit | 0.89 arc sec |
| Zoom Ratio | 20 |
| Optical-Tube Length | 635 Millimeters |
|---|---|
| Objective Lens Diameter | 130 Millimeters |
| Item Dimensions D x W x H | 38″D x 56″W x 38″H |
| Item Weight | 11.4 Pounds |
| Exit Pupil Diameter | 5 Millimeters |
What’s in the box
- Optical Tube
- Single Fork Arm Mount and Tripod
- Accessory Tray
- NexStar+ Hand Control
- 20mm and 9mm eyepiece
- StarPointer™ red dot finderscope
- Star Diagonal
Product guides and documents
20 reviews for Reflector Telescope
Add a review Cancel reply
Related products
Categories
Categories
You may add any content here from XStore Control Panel->Sales booster->Request a quote->Ask a question notification
At sem a enim eu vulputate nullam convallis Iaculis vitae odio faucibus adipiscing urna.











Chad –
I knew I was going to buy a telescope, and I knew it was going to be this telescope because I had done weeks of research to see what was the best in my price range. I found out that I was going to go camping and decided it was time to order it for my trip. I had it shipped 1-day shipping to be sure I got it in time, and it did come in time, however when I set it up and took it out to a baseball field near my house to test it I was very unhappy to find out that the motor that moves the telescope left and right was not working.I drove home and tried to call Celestron support just to find out that this company who sells telescopes, which are mostly used at night, does not actually have technical support available to help you out when you will need it. The great thing is, I bought from NiceShine and not celestron so I simply went online and asked for a replacement telescope and they had the replacement to me in two days. Unfortunately still too late for my camping trip.The good news.The replacement telescope has not had any issues. I have been able to sky align the telescope on the first try everytime, and it does a pretty good job at tracking objects, as long as the tripod is level. The two eyepieces that it came with, the 9mm and 25 mm, are pretty good but dont expect to see distant galaxies with them. With the 9mm eyepiece I can barely see the different layers of clouds on Jupiter. I am looking from close to downtown Salt Lake City so you could probably see more detail when out of the city. I just ordered a barlow x2 lens and expect that in two days and I hope that it comes in time for my next camping trip this weekend which will be my first time I get to use it outside the city. I will also be getting the T ring adapters so that I can use my DSLR camera to test out astrophotography with this telescope.OVERALL:The first one I got was a dud and wouldnt work. Hopefully that was just one out of a million but once I got one that worked it has done everything that I was expecting.
David Filmer –
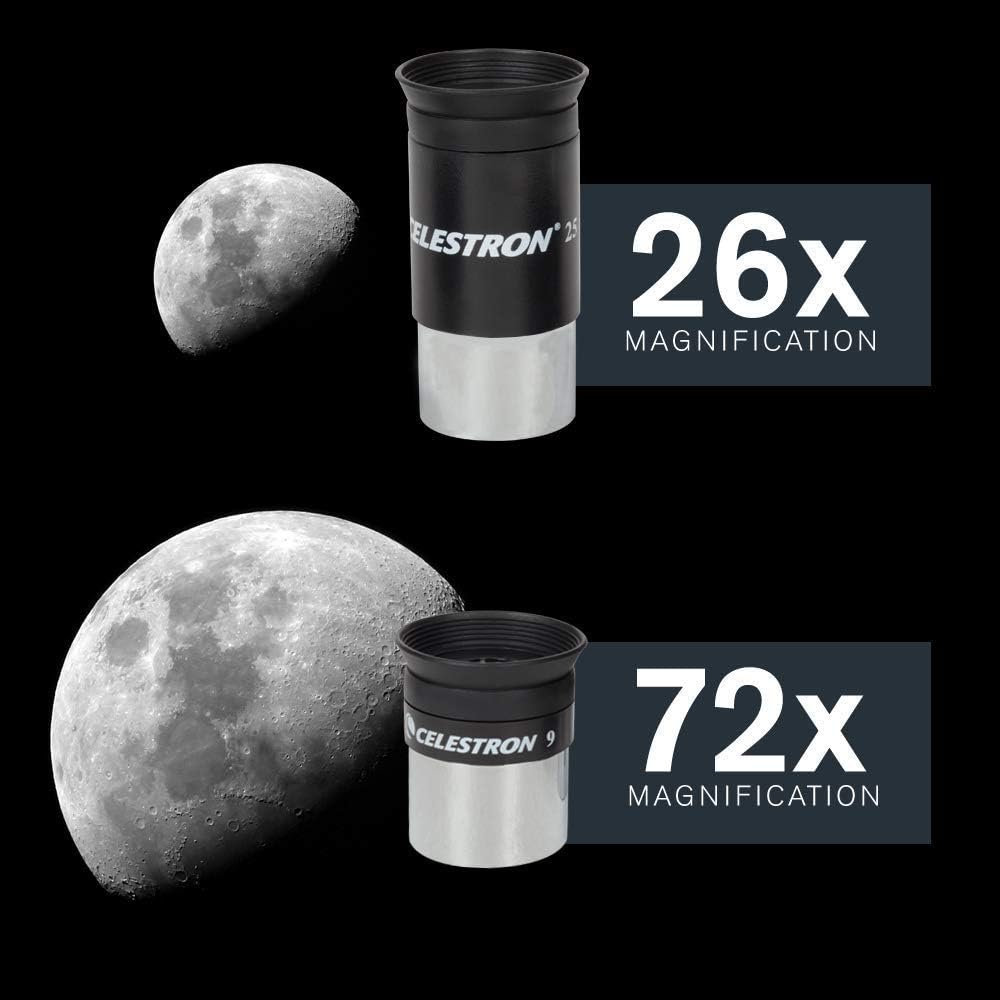
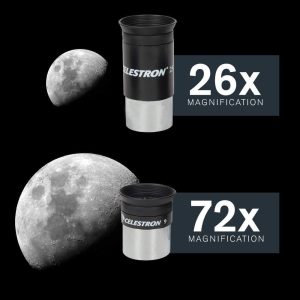
OK, here is the Bible according to Celestron SLT scopes.When the scope is working, it’s fantastic (see below if you have a non-working scope with a boot loader failure). The Newtonian design is comfortable to look through – the eyepiece is at the front of the scope, and it is positioned around eye-level when standing. Newtonian optics are also simple, which keeps the cost down (and minimizes light lost to lens absorption).The optic properties of this scope are outstanding. The 650mm focal length and 150mm (about 5-1/8″) aperture are great specs, especially when paired with the highly-recommended Celestron accessory kit (Celestron Model 94303, available on NiceShine). The scope comes with a 9mm and 25mm eyepiece, for magnifications of 72 and 26 power (magnification is focal length divided by eyepiece length, so magnification increases as focal length increases, and decreases as eyepiece length increases). The big 130mm aperture of this scope gives the scope a maximum useful magnification of about 307 power, using the rule of thumb that you can magnify 60 times for each inch of aperture.At a focal ratio of f5, this is a fairly “fast” scope, meaning it lets in a lot of light for it’s focal length. The f-number is the focal length divided by the aperture size, and the lower the f-number, the faster the scope. Faster is (generally) better. F-numbers will be familiar to photographers, and telescopic “lenses” operate on the exact same concept as fast photographic lenses. In photography, a lens is “fast” because it allows a shorter shutter speed (because it lets in more light), meaning you can capture faster motion that would be blurry with a longer exposure (as would be required by a “slower” lens).The auto-orientation works like magic, but it’s better to give it very precise time and location. Use a GPS for location; don’t just tell it what city you are in (you can choose your location input method). For some reason, the controller can remember your last location and the time zone of your previous observation, but the controller does not keep time when it is switched off, so you must enter the (exact) time again whenever you switch the power off and back on (C’mon, Celestron – seriously?)You can orient the scope by pointing the scope at ANY three bright objects (you do not need to know what they are) or two objects if you know what they are (but this is said to be less precise). The scope must be level (it has a built-in level bubble). Although this scope is not really classified as a “beginner’s scope,” it is great for beginners – you don’t need to know anything to begin viewing amazing things, and a beginner will not “outgrow” this scope anytime soon. The only comparable computerized Newtonian scope that I could find in this price range is the Orion StarBlast 6i IntelliScope, but it is available only with a table-top mount (???). If that Orion scope (750mm focal length, 6-inch aperture) was available with a sturdy tripod mount in this price range then I would be writing this review for that scope, because I would have bought that scope instead, without a doubt. Orion lost my business because they expected me to have a study TABLE available at each observation site.The optional Celestron accessory kit includes (among other things) 6mm, 8mm, 13mm, 17mm, and 32mm eyepieces and a Barlow 2X adapter. With a 6mm eyepiece and a Barlow 2X adapter (which effectively doubles the magnification of the eyepiece, making it a 3mm focal length), the scope can achieve a magnification of 216 power (pretty respectable). You could purchase shorter eyepieces or a 3X Barlow to push the magnification near the 307 power limit, but I don’t think you will find yourself wanting to do so – you will be amazed at what you can clearly see (the bands of Jupiter and its Galilean moons, the rings of Saturn, etc). Note that the 307-power limit cannot be exceeded with eyepieces or Barlow lenses – the image will be pretty much worthless if you try to exceed this limit, which is a function of how much light the scope can gather (which is determined by the aperture size). As you approach this limit, the image quality decreases, so you will probably find images much more satisfying at low-to-mid-200 power than you would at theoretical maximum 300+ power.The gray moon filter in the accessory kit is especially useful for bright objects (such as the moon, of course, but also Venus and Jupiter).The longer eyepieces are needed for viewing large objects such as various asterisms, galaxies, and nebula. Some of these objects span 2 or 3 degrees of sky (or more) – which is really big (the sun and moon are 0.5 degrees.) Some objects can only be fully viewed at very low magnification (such as afforded by binoculars), so don’t make the mistake of assuming that high magnification is always better. If you attend a star party, expect to find binoculars (usually mounted on a tripod) in use. The Pleiades star cluster, for example, is best observed at lower magnification.The eyepieces that come with the scope (and the accessory kit) are 1.25″ diameter, but the scope can also accept large, very nice (and expensive) 2″ eyepieces – just remove the 1.25″ adapter which comes with the scope.The tripod mount is good, but will wiggle a bit in the breeze, especially at higher magnifications. It helps to add some weight – the tripod has a small shelf which lends itself to this purpose. A couple bags of rice or beans will do, but I bought a 20-lb theatrical-grade sandbag (double zippers keep sand out of my optics, and sand doesn’t attract bugs or rodents). Put that weight on your tripod and don’t touch the scope while viewing (take your hand OFF of the focus knob) and you should have a steady view, even in breezy conditions. Stiff winds may require additional measures, such as springs attached to the legs and anchored to stakes in the ground.I was told by someone at a Star Party that this mount is not well suited for long-exposure deep-field photography. As it tracks objects across the sky, the mount makes slow adjustments, but it does not adjust azimuth (side-to-side) and altitude (up-and-down) at the same time, but in succession, in a stair-step pattern. The eye won’t notice, but a long-exposure photo will see blurring. Alas. But I have not verified this info. In any event, it should work fine for short-exposure shots, like the moon (you will need a camera adapter, of course).The motorized mount goes through batteries pretty fast, especially if it is tracking something all the time. The default power source of eight (standard alkaline) AA batteries will probably last a night, but I would not push it to two nights if I had been tracking the whole night before. You can hook it up to a car battery and it will run forever. I use a wheelchair gel battery – they are smaller and lighter than car batteries, and will take the deep-cycle use (charge and deplete, charge and deplete). Buy a trickle charger and use it when the battery is not being used, to keep the battery fresh and extend its life. Or you can get the Celestron Power Tank. You can use an AC adapter if you have access to AC – any adapter that puts out 12 volts DC at 2.5 amps or more with a 2.5mm barrel plug (negative on outside, which is standard) will work just fine (you can have all the extra amps you want – it won’t hurt anything). There are scads of suitable adapters on NiceShine that are a whole lot cheaper than the one Celestron sells.This is a Newtonian scope, and Netownians are subject to collimation errors, meaning that the two mirrors are not precisely aligned. I recommend the Celestron Collimation Eyepiece (Celestron Model 94182, available on NiceShine). This will allow you to quickly and easily (and accurately) calibrate your scope for an absolutely perfect image. Some people do this each time they transport their scope, because any sort of vibration can cause the mirrors to drift (though it seems to be a rather minor problem for this scope, in my experience). The instructions that come with the eyepiece are excellent.Get a red flashlight. Celestron makes one that has a dimmer. Red won’t mess up your night vision nearly as badly as other wavelengths.I rate this scope at five stars, despite the BOOT LOADER problem (solution below).========= BOOT LOADER PROBLEM ====================================================Within two days of getting this scope, it failed to “boot” (the mount is computerized, and it needs to successfully “boot up,” just like any computer. If it cannot boot, it is useless). When the hand controller was turned on, it said, “reading packages” and then stopped with an error message, “BOOT LOADER Invalid Pkg: 0080.” This renders the scope dead – it cannot be moved, even with manual arrow buttons.Fixing the problem is a bit tricky. You need to flash the firmware in your hand controller (which has somehow become corrupted), but it’s not as simple (or as well-documented) as it should be.First, you need to buy a serial cable to connect your computer to the controller. It’s 9-pin RS-232 (female) on one end and a modular connector on the other end (it looks like a telephone plug). The Celestron model number for this cable is 93920, and you can buy it on NiceShine.If you have a reasonably modern computer then you probably don’t have a serial port. If you have a 9-pin MALE D-connector then you have a serial port (though it may be disabled in your system BIOS settings). Otherwise you need to buy serial capability – I recommend a USB to Serial converter (also available on NiceShine from many suppliers).Connect the computer to the controller. Make sure you are plugging the serial cable into the base of the handheld controller, and not into the body of the motorized mount. Both the controller and the mount have modular serial connections (and both can be flashed), but you are flashing the handheld controller, not the mount.You need to download and install the Celestron Firmware Manager (CFM) from Celestron’s website (it’s in Support/Downloads/Software, near the bottom of the list). It’s a Java application, so it should work on any computer platform. But it will be downloaded as a zipfile – you must extract the contents and then run CFM.jar (on Windows, just double-click it). You can’t run it within the zipfile – it must be extracted. Make sure your scope is connected first.THIS IS IMPORTANT: There are two types of Celestron motorized controllers. There’s the Alt/Az (which is used by this SLT mount, as well as LCM, SE 4/5/6/8, and CPC) and the Equatorial mount (used by CGE, Advanced, and CGE*). In the CFM menu (along the top of the CFM window), select “Hand Control” and make sure the proper type of control is selected for your model of scope (this CST scope is Alt/Az). THIS IS THE REALLY REALLY IMPORTANT PART – Under the mount type selection you will see three radio buttons. The first one is selected by default, and it tells CFM to automatically detect the mount type. This is NOT GOOD. CFM thought I had an Equatorial mount. Even if I select Alt/Az, my selection will be overridden by the “Auto Detect” option. Select the Second option, which says “Always do what I selected this time” and CFM will then respect your selection.Now flash the controller in the CFM, and you should be good to go.And if you go to a remote site or star party, it’s a good idea to bring a laptop with CFM (and your cables), just in case you need to do this again. I was 160 miles from home (beneath a rare Class-1 darksky!!!) when I had this problem. Fortunately it was only an hour before sunrise, so I didn’t miss too much.
JeffNJ –
Only got one look through it so far, at Jupiter, but very pleased so far.The optical tube assembly is very sturdy. Out of the box, I used a laser collimator to align the mirrors, and they needed a bit of adjustment. This scope is well suited for a laser collimator and there are good YouTube videos detailing the easy procedure.Assembly was very easy, no complaints at all. Once outside, first task was to align the finder scope. It is a red dot scope powered by a small battery. Took a bit of searching to get Jupiter centered in the telescope without an accurate finder scope, but once I found it (with the 25mm eyepiece), its a simple matter to get the red dot on Jupiter in the finder scope, aligning it with two screws.Once the finder scope was aligned, it was a very easy to use the three-star alignment for the scope drive. Putting the red dot in the finder scope on a bright star, it was already nearly centered in the eyepiece. A slight adjustment and hitting the align button, I was ready to go to the second and third stars. Completing all three in less than two minutes on my first attempt. After alignment, its just a matter of choosing your target from the menu and the scope slews and tracks it.The motor has nine speeds, easy to switch through them. The highest speed quickly gets you where you need to be and without much noise. Not silent by any means, but will certainly not disturb anyone. Lower slew speeds are nearly silent.Being a less expensive scope, the tripod is not the sturdiest. Once aligned, be sure not to nudge any of the legs. I have not yet tried astro-photography with the scope.The eight AA batteries will not last long, but you’ll get at least a couple hours of tracking and slewing. An AC or DC power adapter or lead battery power source should be used.Pro:Optical tube and drive build quality for priceGreat opticsPacked great for shippingCons:Tripod could be sturdierNo way to keep time and date after powering off. Must be entered each power on. Location and other options are remembered.Not much out there in the way of cases for bags specifically for this model. You will have to customize a generic case.
Richard J. Bartlett –
I got this yesterday afternoon with first light for the Celestron NexStar 130 SLT last night… I live in the suburbs of Los Angeles so I was curious to see how it would fare under light polluted skies. It was quick and easy to set up; I wish it was easier to change the slew speeds but that’s a minor quibble.I have to say I’ve been quite impressed. As an FYI, it was partly cloudy and we had a lot of high level cloud interfering with some views later that night (it rained in the early hours of the morning.)First was Venus, then Mars and Mercury. You could easily see the discs of the planets – later in the evening, I turned to Uranus as well and with the 9mm eyepiece (62x) you could barely make out a tiny disc.Later on, I ran it through its paces with the Andromeda Galaxy, Almach, the double cluster, Uranus, the Pleiades, the Orion Nebula, M43, Alnitak, Gamma Arietis, Zeta Piscium and Comet Lovejoy.Couldn’t see M78, M79 and the Crab Nebula under the light polluted skies but these are all easily within reach of the ‘scope.I’m impressed by its ability to align with just one star or by simply pointing the ‘scope at three random stars. Very useful for someone like me, whose view of the entire eastern half of the sky is blocked by our apartment building. If you only use one or two stars or the SkyAlign (where you randomly pick stars to align with) you’ll probably need to re-sync the ‘scope later.The object would rarely appear dead in the center and the ‘scope would nearly always need to be slewed slightly, but I was expecting that. The object would almost always appear in the field of view, but occasionally might just be outside of it – someone totally unfamiliar with the night sky that might be frustrating as they won’t know what they’re looking for.As someone who’s never really properly used a motoized ‘scope, I love having the luxury of not having to constantly move it to track the object. I was able to just enjoy the view. Optics seemed very good as double star images appeared crisp and colourful. With the 9mm eyepiece (62x) the Orion Nebula showed a greenish tint and there was visible texture, even through the light pollution. The Trapezium looked particularly nice.I hope to compile a list of objects that can be seen from light polluted skies…One thing learnt: in a city, a GoTo is invaluable as the sky is too bright to star hop with a finderscope.In the country (or darker suburbs of smaller towns) star hopping is always much more fun. A good star chart, a book and a flashlight will always help you to find something new – but if you don’t have the time (or the clouds are quickly rolling in) then the GoTo offers a great alternative.
Robert Johnson –
My wife bought this scope for me for Christmas. I had no experience with astronomy prior to that. It’s a little finicky to set up but once you do it correctly, it’ll work well. The image may not be exactly in the center but it should be close.The eyepieces that come with it are just okay. They’re a step below kelner eyepieces (which is below Plossls). For eyepieces, use a low power eyepiece (25mm) to scan for objects. With eyepieces, the lower the number the higher the magnification. If you buy eyepieces, stick to good quality eyepieces in the 5mm to 35mm range. More magnification (35mm) will result in an exit pupil that is too large (makes it difficult to see without a moving black blob appearing in the eyepiece). Celestron X-Cel eyepieces would work well for this scope and aren’t too expensive. I like the Baader Hyperion as well. It gives a wide angle view and a large eyeglass with good eye relief to look through (great for eyeglass wearers). A x2 Barlow lens is a good option to pick up as well. Combined with your eyepieces, it doubles your available magnifications (9mm becomes a 4.5mm, 25mm becomes a 12.5mm). I have the Orion shorty x2 barlow.Don’t bother with the eyepiece kits. The optics are too close together in strength so you’ll probably only use 3 of the 5. The color filters are pretty useless except for a moon filter. All you really need are 3 eyepieces a low power (no greater than 35mm), a medium power (14-18mm) and a high power (no less than 5mm).You’ll need a collimator. With Newtonians, you’ll need to align the mirrors. It’s best if you check it each night before you use it. Moving the telescope can knock it out of wack. A collimator helps you line everything back up. I have the Orion laser collimator.Here are some setup tips for setting up the scope for Goto use:1. If you picked a city instead of entering a latitude longitude, and you don’t actually live in the middle of the city (you just picked the closest one), do a factory reset of the computer and choose latitude-longitude instead. It’s much more accurate. You can find the latitude longitude with a smart-phone app (e.g. Compass for Android) or by googling your address. You’ll need the lat long in degrees, minutes, seconds (not the digital version like -117.0101). It should look like W 117 15′ 12’Sometimes a city selection is too broad. I am about 20-30 miles outside the city I chose and it makes a big difference when the scope is skewing.2. Make sure you’re using the correct time/date settings including daylight savings time vs standard time. Use your cellphone time.3. Instead of using 3-star align, use Auto-Two-Star align. It’ll require you to know the names of the stars but it’s much better. I use Google Skymap to find one of the stars in the list if I don’t know the name or the ones I do know are obscured. If you use the 3-star align, chose bright stars that are on opposite sides of the sky and not in a line (a triangle pattern is preferred). For example, if you just used the stars in Orion, that’s probably too small of an area of the sky. Choose one star in Orion (e.g. Betelgeuse), one in Gemini (e.g. Castor) and one in Cassiopeia.4. When centering a star during alignment, defocus the star so it looks like a ball rather than a point of light. It’ll be much easier to get in in the center.5. When centering on the final star try to move the scope in the same direction as it was moving when it skewed to the star you chose. So for example, if it was moving down and to the left when it stopped, position the scope so that when you get it in the center of the view that you are moving it down and to the left when you stop.UPDATE 5/19/2016: I recently purchased a ZWO ASI185MC camera that I’m using with the 130SLT. The camera will easily come to focus when used in the 2″ adapter. It will come to focus in the 1.25″ adapter as well but it’s a little closer to max in-focus. I’m getting pretty good images with it doing short exposure (. The scope will slew to the object and there’s a good chance it will be centered in your eyepiece. I use this feature with my camera and it almost always gets it close to the field of view. You should easily find the object in the field of view of a 25mm eyepiece (though it may be faint and fuzzy).
Bryan –
Last week I received my NexStar 130 SLT. I made the decision to buy this scope based almost entirely on the recommendations of reviewers both here on NiceShine and elsewhere. This is my first telescope, and I will say will say up front that I am completely happy with this scope! Regarding the negative reviews, I can sympathize that in some cases a truly defective article can arrive. For many, I would suspect that the issues encountered were largely of their own making. While in the main, this scope is relatively simple to set up and use, it still helps to have at least a modicum of technical skill (a healthy dose of common sense will help too!).The evening I received the scope (15 July) I set it up on my deck. Yes, not the most stable of platform, but I live in a dense neighborhood with lots of obstructions and murderous light pollution. The star alignment, using the 3-star “Star Align” process, took me two attempts. I blame my ineptitude with the use of an eyepiece and not having stars truly centered in the field of view for this. Regarding this, I think an eyepiece with a crosshair would be excellent for performing these alignments. (Another night I had multiple failures. This turned out to be related to the incorrect time, which was off by a few hours. The system will apparently remember the last values you entered. Be advised, they will not update and will be incorrect. Check your time and date each time you power up the system! (Many complain that the system does not retain the time once it is entered. I would venture a guess here as to why. The simple truth is that it would drift off of “real” time within a very short matter of time. Maybe adding the optional GPS module would fix this problem, but the internal NexStar clock is simply freewheeling and will inevitably be off the longer it ran on its own. Having to re-enter it each time you power up ensures that time is not an issue during the alignment procedure. Imagine your frustration if you took tons of time aligning each star in your eyepiece, and despite your best efforts the system would not align? Re-entering the time alleviates this factor, assuming you enter it correctly!)For my location, I simply plotted my deck in Google Earth and wrote down the coordinates. This seems to have enough fidelity for the star alignment to work.Once I had the telescope aligned I picked a random bright object in the southern sky to examine. Imagine my surprise when the first celestial body I have ever viewed through a telescope turned out to be Saturn! Using the provided 9mm eyepiece, the rings were clearly visible. I had not yet received my collimation eyepiece, so I was worried that it might need an adjustment. No adjustment necessary on my scope at this time! I am looking forward to viewing through higher-quality optics though.Regarding the stability issues that many have commented about. Yes, images do move about quite easily, especially on my wooden deck. I have not yet weighted the tripod or gotten a set of the damping pads. I will say that image stabilization is not completely unbearable on my scope. In just a couple of seconds after making a focusing or alignment adjustment, images became still enough to view nicely. I can only imagine this will improve with weights and dampers. I do see why this scope would not be ideal for astrophotograpy though. I would think it would not be impossible, but you would have to ensure the scope is deployed on a solid foundation and go to great lengths not to disturb the scope in any way.I was able to configure and control my scope with Celestron’s enclosed NexStar Observer List (NSOL) software and the freeware Stellarium packages relatively painlessly. Install the drivers that come with your USB-to-Serial Port adapter. (The computer interface to the NexStar handset requires a serial RJ-11 phone jack. Celestron sells a cable with an RJ-11 phone connector on one end and computer 9-pin RS-232 serial port connector on the other. Most likely your computer/laptop will not have a serial port, so you will have to further adapt this to USB) My laptop configured the COM3 serial port, but your mileage may vary depending on your system. Make sure to restart your computer once the drivers are installed. Truth in advertising, I tested my scope indoors using an arbitrary alignment. The scope tracked and moved what seemed to be the proper azimuths and elevations for the objects I selected in the software. Any issues I find in the wild once I get the scope outside again can likely be mitigated with the anti-backlash settings for the motor drive. If there is anything significant I find, I’ll make an update!Regarding some of the slewing, anti-backlash, and cord wrap settings, I would have appreciated a little more information in the manual as to what the settings actually do and how they work. I did see an example where my scope attempted to go the long way around counterclockwise to a position that just should have been about 10 degrees clockwise. This was very likely due to bad settings in the aforementioned utilities. I made a few tweaks after that and the problem seems to be alleviated, though I am not exactly sure which setting did the trick! :-)At the end of the day, I have to say that for the money, this scope does everything it is intended to do. Have some realistic expectations going in. You are not going to get Hubble Space Telescope views out of this scope! But you will get a lot of enjoyment out of it if you take the time to set it up and align it properly. I did get a good view of a deep space galaxy, which as many have stated, was simply a distant smudge of stars. However, it was clearly visible amongst the background of distinct stars.
M.A. –
I think this is probably the best telescope you can buy for $400. But there’s still a lot of things about it that make it not great. It is definitely a four-star scope, it’s a good product and I recommend it, but it falls short on some things.Good Things:- Good quality optics and parts, does not feel cheap- Attention to detail by Celestron like a red dot in the finder scope, a leveling bubble on the base to make sure the scope is level, sturdy legs, dim red lit hand control…- Takes 2″ eyepieces for a very nice wide field of view (82o with their Luminos line)- Motors are convenient- Overall not bad at all- Brightness – Being a 5.25″ reflector, it’s quite bright when viewing the moon, so you’ll want a moon filter. For reference, the Andromeda Galaxy looks like a somewhat faint haze around a central star.- 2 Included Eyepieces – The included 25mm and 9mm are nice, clear and wide, but not their Omni Plossl line, so you’ll want to get some more lenses.- It knows which stars are out of its range, so the tube won’t hit the baseBad Things:- Structural – Shakes a lot when you touch it. It continues to wobble for quite a while, so it becomes very difficult to focus- Focuser – NEEDS A FINE FOCUS!! The focus knob is not sensitive enough for fine focusing, especially at higher powers. It really needed a separate fine focus knob, or the main one should be a finer gear ratio. Add that to the wobbling of the scope and you have a very difficult focuser. A motorized focus would have been better, that way you wouldn’t make the thing wobble while you’re trying to change it.- Collimation – Collimation is very hard. This may be true across most telescopes, but there are 3 screws for collimation (and no included tool!!) and each screw does something different depending on the position of the other screws, it’s extremely frustrating. It would’ve been so much easier to engineer instead a simple flat vertical plate behind the mirror assembly with 4 hand-tightened screws, 2 controlling the vertical axis and 2 on the horizontal. Collimation would be a breeze, but this way it’s very frustrating and time consuming.- NexStar – The alignment of the star tracking system is very very difficult to get working. Even if I point it at several very bright, known stars, with my location, date and time, it makes me go through the whole process and then says simply: “alignment failed”, and that’s it, no other feedback. I tried all the different ways to align, I was only able to get it working once with the auto align feature, but even then, it was way off when it would point at anything. I tried correcting its reference stars, but it didn’t help. Also, it says on the manual that it’ll ask you for your city, but it never does, just the timezone. I’ve yet to see the goto function working.- Motors – The max speed of the servo motors is very slow when changing to a different section of the sky, and seeing as you need to do this every time you align the computer with the stars, the process takes a long time, and it’s very frustrating when you’re trying to get the thing aligned for the third time and you’re getting cold and still haven’t been able to look at anything. Also, the motors have backlash, meaning that if you get to a star using a higher speed and overshoot it by just a little bit, you want to move it back using a slower speed, but the motors are wound up by the higher speed, so it takes a long time of pressing in the opposite direction to bring it back to zero and actually start it moving. There’s an anti-backlash feature in the settings you can turn on, but it has different values that affect it differently depending on the ratio of the speeds you intend to change between.- Computer Connectivity – The cable required for connecting your computer is an phone-jack plug. You can buy from Celestron the cable that connects to that, but it’s an archaic 9-pin serial at the other end, so you need another cable that converts that to USB, unless you want to take your old desktop out with you to look at the stars. Why not just give it a USB port? And of the programs that come with the scope, one is windows only (the one you actually use to control your scope), and both come on CDs and I see no download available on their site, so if you have a mac laptop with no CD drive, you’re pretty much out of luck. Come on, guys, you can do better than this.- Power cord is on a part of the scope that turns, so it easily gets coiled around the telescope, which can lock up the motors.- Oh, and don’t forget you need to buy the power supply separate.
John –
Excellent scope for beginners and experienced observers alike. Setup took just a few minutes and was up and running within 30 minutes. FYI, the scope works great with Celestron’s SkyPortal Wi-Fi adapter and the SkyPortal app. So even though the product description says there is a catalog of over 4,000 items in the hand control, you actually have more than that by using SkyPortal.I am impressed at how solid the tripod is. It is as solid as the one that came with my Celestron NexStar 8 SE. Optics are as good as expected although I did have to collimate the primary mirror due to the locking screws not being tightened to hold the collmiation knobs in place. But that took less than a minute with the laser collimator I ordered with this scope. One note about the adjustment screws for the secondary mirror: The 2 mm hex screws are extremely tight. Use a hex wrench with a handle long enough to give you some good torque to them them started while holding the secondary mirror assembly with your free hand. DO NOT loosen the Phillips head screw in the center. That holds the secondary in place and has nothing to do with collimation.The hand controller that came with my scope looks nothing like what is in the manual. First, the buttons on my hand controller are identical to the ones on my 8 SE. So, booting the mount in order to flash the firmware is impossible. Next, the manual states there is a serial port at the bottom of the hand controller. There is not. It is a mini-b port and I cannot find a serial cable adapter that will work with that connection. I can use the hand controller for my 8 SE on this scope but cannot get CFM update software to work with the mount.I had to return the scope because of a malfunction. I probably could have fixed it myself but that would have voided the warranty. A replacement scope was delivered sooner than expected and the return was as easy as boxing it back up and waiting for the UPS driver to show up with a label and carry it away. Excellent service and another reason I shop with NiceShine so much.
SJH –
The 130SLT + the $75 Celestron wifi module = awesome. As a beginner, after a couple times I was able to do a 3 star alignment quickly (under 5 min) with this scope using my iPhone. Optics are great, split double stars and Hercules cluster looked great, can see the bands on Jupiter and it’s moons. Earth’s moon looks incredible!!Pro’s:-light weight easy to travel with-good optics even with 5″ primary mirror-great Goto accuracy with 3 star alignment-super easy to collimate primary mirror-easy setup, 10x easier than a GEMCon’s:-the OTA is bit much for the mount to handle. If using on a deck you will need to get vibration suppression pads!-Alt az mount is limited to like 70 degrees up so no looking near the zenith of the sky.-need lots of extra parts for a good setup, see recommended list below.Recommended need to have extras:-Celestron Skyportal app (free)-Celestron power tank ($60) for use at dark sites-Celestron Power adapter ($20 if using near a power source)-Celestron Wifi dongle ($75)-2x Barlow for planetary and moon-moon filter so you can observe the moon ($20)Nice to have accessories:-Orion Accufocus $80 (stops shaking of OTA when you manual try to focus and dials in precise fine focus)-Skyglow light pollution filter if using in a light polluted area-Mead 12-24mm zoom eyepiece-vibration suppression pads ($25)-reticle laser eyepiece for centering stars during alignment ($40)Tips n tricks:-the “grease” that comes stock on the focuses is terrible, practically glue like. Carefully disassemble focuser (easy) clean and re-grease. I used Phil Wood’s bearing grease I already had for my bikes. Removes most of the “slop” and “stiction” in the focuser.-make a 4″ dew shield if viewing in areas with stray light pollution to improve contrast-place a 5lb weight on the tray to stabilize the mount-get vibration suppression pads if using on a deck or concrete!!!-my wifi module or AUX port was not making a good connection, not sure which so I returned the scope and upgraded to an AVX with CN8. If you get this problem, use a rubber band to pull the wifi module tighter into the AUX port-instead of getting a $50 illuminated reticle eyepiece for centering stars during alignment, you can defocus the star instead and make it large to center in the FoVIn the end I upgraded to an 8″ reflector with an AVX GEM mount. However, the 5″ 130SLT was like 10x easier to use and setup… if I had to do it again for visual use I would look at the 8 or 10″ Orion GoTo Dobsonian’s for sure! A GEM + Newtonian scope don’t mix, bad combo. For the price tho and ease of use, the 130SLT scope is awesome. However, for it to be fun to use you need to spend about $100-150 in extras.
Mr Thomas –
I also for security purposes as to be shipped in a different box… Big , BIG. mistake.. many things went wrong on this purchase, it was supposed to arrived on Firday., Nov. 30th, I m 65 yrs old and this was going to be my Christmas present to me. I m on SS.. and was spending above my means. but I wanted a hobby. and I didn’t want something I was not going to be satisfied with. Power and ability wise.. I m a complete novice at this .. but thought I should buy something that would out last me. So it didn t come and I was heart broken.. I purchased batteries for the mount.. and had extra for the hand held piece. and was very excited to get it set up.. Saturday.. nothing, went to check my NiceShine page and it just said, they were sorry , that the delivery wasn t made. I did get it today Monday, 12/03/ 18.it was packaged in a different box for sure.. but I still thought I would get the original telescope box. and the packaging that was done, was Crap.. this is a delicate instrument.. Ok not like grandfathers clock.. but , you understand.. mirrors and alignments must be kept. I opened the package, and it was all loose pieces,, with big bubble packs.. 1″x 3″ and the scope and accessories in plastic bags. and a lot of empty space left in the box.. no foam around anything. I pulled out the scope and when I got it out.. it rattled.. that was scary so I opened the plastic bag and turned it upside down and right side up and it rattled some more.. then I put it on its side and was checking out the tube on the 130 and right by the sight mount for the red dot star finder. the scope had a dent , a crease , in the tube that was double the length of the mounting scope..Thanks to Kathleen at NiceShine Return.. She was so great and helpful and understanding.. now I just have to find out how much it will cost me to send back 18 lbs of merchandise that I didn t have to pay for when shipped. to me 4 days late.I hope I can get a deal on a brand new Celestron 130 SLT computerized scope for my new hobby.
JOANNE –
I bought this scope to replace my old Mead 4.5″ reflector scope which has served me well for well over 20 years. This scope actually surprised me at how good the quality of the mount is and the scope itself is no joke!This scope is set-up beautifully for the beginner. It came direct from Celestron and was boxed very well. Since I know my way around telescopes a little bit, putting this thing together was no problem without using the instruction book that came with it. I did look at the instructions prior to writing this review and they are pretty straight forward for the beginner. You should have no problems with set up and it will only take about 15 minutes to all together and ready for viewing.I instantly fell in love with the NexStar hand controller. It can be updated right from your computer with a mini-USB cord (not included) so it has the latest sky data and control inputs from Celestron. It has several calibrating options including a Sky Align feature where you don’t even have to have a knowledge of stars to align the scope. There are many tracking and slewing settings so the scope can be tailored to your viewing style. There are many functions built right into the controller that will make your gazing much more fun even you have no knowledge of the night sky.I ran the scope with batteries the first night I used it. It was okay, but I only got about 2 hours of use out of the batteries before I had to change them. I do recommend purchasing the 12V power adapter.The two eye pieces that come with it are great for general viewing and are completely meant for beginners. I purchased an additional eye piece set and filters (also available from Celestron) right from the get go as I knew they would not suffice for me. Once you get used to operating the scope and figure out all of the functions on the hand held controller, you will find yourself wanting better and more detailed views. It is worth the extra $100-$150 for additional eye pieces. If you do decide to purchase additional eye pieces and filters, I can tell you from experience, you will get what you pay for. Cheap eye pieces look good on paper, but not so good when you are looking through them.For less than $500 this is a perfect scope for the beginner right out of the box. For the veteran star gazers on a budget, for less than a $800 you can have a set-up that will rival even some of the most expensive set-ups. You just can’t go wrong.Clear skies to all!
Agueybana –
Unfortunately, it arrived with the spider vane bent. Usually this isn’t a big deal for a newtonian/reflector but in my case it was preventing the scope to achieve collimation. Collimation would last until the go to track a target. I will update the once I receive the replacement one.The mount itself, it’s ok even though the scope is too much for the tripod. If it’s extended all the way, it shakes like if it were on a subway. Probably better to move it to a surveying tripod.The red dot finder does it job. Once it’s aligned it’s very easy to find a target. Something you’ll only need to do a few times when you’re aligning the scope (2/3 star align).Solar system alignment isn’t the greatest. I tested this method with Jupiter and Saturn. The go-to failed to track the Moon and Mars by 5 degrees.The eyepieces are ok for entry level eyepieces. The 25mm is go to find targets or to observe “bigger” DSOs.Recommendations1. Learn how to collimate your scope. There are a lot of videos that can help with this. This is something that you just do before enjoying the scope and the night sky. Don’t be intimidated by it. It’s very easy to do.2. Ditch the batteries and get a power supply adapter. The one below works like a charm. https://www.amazon.com/gp/aw/d/B08BHS4X44?psc=1&ref=ppx_pop_mob_b_asin_title3. Get a 2x barlow, start with something cheap to get started while you learn the sky. On the good days (night) a barlow will allow you to get “closer” to the planets and moon. Something like an svbony 2x barlow: https://www.amazon.com/SVBONY-Barlow-Multi-coated-Internal-T-thread/dp/B07ZDMJ81F/ref=mp_s_a_1_6?dchild=1&keywords=svbony+2x+barlow+lens+1.25+inch&qid=1604271152&sprefix=svbony+2x&sr=8-64. Once you get the hang of it, get wide angle eyepieces. You can start with low cost ones to get started and experience the differences. The svbony gold/red line will cover you on this one, and you won’t lol the budget wine this starting out. https://www.amazon.com/dp/B07C6LRCNN/?coliid=I18EQHISUTYBQ4&colid=H3KWCP7HB0AU&psc=1&ref_=lv_ov_lig_dp_itYou can also get a zoom eyepiece. This week come in handy if you decide to try astrophotography with a cell phone. https://www.amazon.com/SVBONY-Telescope-Eyepiece-Astronomic-Telescopes/dp/B07XZ6DY18/ref=mp_s_a_1_1?dchild=1&keywords=svbony+zoom+eyepiece+1.25&qid=1604271463&sprefix=svbony+zoo&sr=8-15. Make your own power tank out of SLA batteries. This will come in handy if you go to a dark site. https://www.amazon.com/dp/B00KQX5EDO/?coliid=I1RLG3HDA89BA&colid=6GQJJHRIP7QB&psc=1&ref_=lv_ov_lig_dp_it6. If you’re completely new, get Turn left at orion. Should probably be acquired before buying the scope. You’ll learn a lot about the sky with the book. https://www.amazon.com/Turn-Left-Orion-Hundreds-Telescope/dp/1108457568/ref=mp_s_a_1_1_sspa?dchild=1&keywords=turn+left+at+orion&qid=1604271720&sprefix=turn+left&sr=8-1-spons&psc=1&spLa=ZW5jcnlwdGVkUXVhbGlmaWVyPUEzSkwxVkYxUlQxMkg1JmVuY3J5cHRlZElkPUEwMTQ2MDExMzYzQlhRR1RGOUcwWSZlbmNyeXB0ZWRBZElkPUEwODcyMDgxVjVSNlg5QVZXSFJLJndpZGdldE5hbWU9c3BfcGhvbmVfc2VhcmNoX2F0ZiZhY3Rpb249Y2xpY2tSZWRpcmVjdCZkb05vdExvZ0NsaWNrPXRydWU=7. To help with the weather and what to observe, download Clear Outside, Nightshift, Sky Safari, Sky Map, Stellarium. Some are available online and well so you can plan your sessions from your computer.8. Get a moon filter. Something attend $10/15 will do.
John Haughey –
I’ve always wanted a ‘quality’ telescope,given my lack of knowledge and experience with locating sky objects,I really wanted one w/ a ‘goto’ tripod and a computer interface.This telescope fit my needs and budget, especially on ‘prime day’,so I bought it.I’m extremely impressed with the telescope, I can see quite a few deep sky objects, which is what I’m mainly interested in.Pros:- Easy assembly, self explanatory really.- The packaging was amazing, there is very little chance this telescope was going to suffer any shippingdamage.- The auto 2 star alignment works very well, it’s pretty cool how it just locks on pretty much any star/planet/deep sky object.- The computer interface just works with ‘Starry night’ software, you do need to align the telescope prior to connecting.Cons:- The tripod is a bit shaky and lighter duty than I would of thought.- I could never get the 3 star align to work, but the auto 2 star align works for me every time.- It takes 8 batteries plus the laser LED battery in the finder scope, so I run it off a wall wart, which you buy separately.- The hand control is a bit cumbersome, I have a hard time using it in the dark.- For me, the tracking accuracy does deteriorate over time, so after an hour or so, I find a re-alignment is in order.- I do wish it auto realigned based on the manual adjustments you do when tracking an object,(maybe it does and I just don’t know how to do it)Overall, I would definitely recommend this telescope, especially to beginners like me.
Nicholas I –
The media could not be loaded.
I have always been interested in space, and so two months ago I bought a manual telescope and I out grew it right away. I just bought this telescope, and it is amazing. It¡¯s a bit of a learning curve, but it works flawlessly once you get your sea legs. The instruction manual is well written and gives very clear directions. (These images were taken using my ZWO ASI66mc planetary camera.)I recommend instead of picking a city to align the telescope, you enter your exact coordinates of your location. You can find that on the compass feature on your iPhone. You can just point the telescope at three random stars to align it without having to know what objects they are. I found that the Sky Guide app though is really helpful.Overall, this is a 5 out of 5!
Jackie Williams –
I have had this telescope since September and it¡¯s by far the best telescope I have owned. The clarity is stunning. The magnification is incredible with the right eyepiece, I recommend one with a 2x Barlow lens. I recommend on getting a power tank this scope will go through the batteries. I recommend one with getting a good eyepiece kit. The tripod is sturdy enough, it may wobble during high windy days. On good clear nights you can see the band on Jupiter and the rings on Saturn. The thing that I enjoy looking at are the sunspots, you will need to get a solar filter. The only complaint I have with this telescope is at times it¡¯s hard to do the 3 star alignment, other than that I have thoroughly enjoyed using this telescope. This has turned into a hobby for me. This telescope is great for taking photos, you need a mirror less camera or a good 2x Barlow lens.
Sean Tracey –
The Celestron 130SLT Computerized Telescope is a fantastic option for beginners and amateur astronomers who want a reliable, easy-to-use telescope that provides impressive performance without a steep learning curve. With its 130mm aperture, this telescope offers excellent light-gathering capability, providing bright and clear images of a wide range of celestial objects. Whether you¡¯re just starting out in astronomy or you¡¯re an experienced stargazer looking for something more portable and user-friendly, the 130SLT offers a solid viewing experience that delivers on its promises.One of the telescope¡¯s standout features is the SkyAlign computerized mount, which simplifies the setup process. Aligning the telescope is quick and easy ¡ª the mount guides you through the process, ensuring you¡¯re ready to observe in just a few simple steps. This computerized mount automatically locates and tracks celestial objects for you, eliminating the need for time-consuming manual adjustments. Once aligned, you can easily select from a database of over 4,000 celestial objects using the included nexStar hand controller. This feature makes the telescope perfect for those who are new to stargazing and don¡¯t want to spend a lot of time searching for objects by hand. The system¡¯s accuracy means you can focus on enjoying the view rather than worrying about alignment issues.In terms of optics, the 130mm reflector design provides a sharp, clear view of the night sky. This telescope excels in delivering detailed views of the Moon, showing off craters and surface features in crisp resolution. It also provides beautiful views of planets like Jupiter and Saturn, allowing you to see Jupiter¡¯s cloud bands and the stunning rings of Saturn in excellent detail. Additionally, it offers great views of deep-sky objects such as galaxies, nebulae, and star clusters, making it a versatile telescope for those interested in exploring a wide variety of celestial phenomena. While the 130SLT is an entry-level model, the image quality it provides is impressive for the price, and it makes celestial observation much more accessible to newcomers.The telescope is designed with portability in mind. Weighing only around 18 pounds, it¡¯s lightweight enough to easily carry and set up at dark-sky locations, where you can escape the light pollution of city environments for the best views. The mount and tripod provide a stable base, and while they might not be as heavy-duty as those found in higher-end models, they still provide smooth movements and solid tracking. This makes the telescope perfect for those who want to take it on the go for impromptu stargazing sessions, whether it¡¯s in the backyard or at a remote location away from artificial lights.In terms of ease of use, the Celestron 130SLT truly shines. The SkyAlign system makes it incredibly user-friendly, even for complete beginners. You don¡¯t need to worry about complicated setup processes or manual adjustments ¡ª the telescope takes care of everything for you. The auto-tracking feature also means you can enjoy longer observation sessions without the need to constantly reposition the telescope. Whether you’re focusing on the Moon¡¯s craters, tracking Jupiter and its moons, or exploring distant galaxies, the telescope is designed to offer a seamless experience that¡¯s both fun and educational.However, there are a few minor drawbacks to keep in mind. While the included 25mm and 10mm eyepieces are a good starting point, they may not provide the highest magnification or the clearest views possible. For those looking to get even more out of their observations, investing in higher-quality eyepieces or accessories, such as a Barlow lens or filters, can help enhance the viewing experience. Additionally, although the mount is generally reliable, it¡¯s not as heavy-duty as more expensive models, meaning that in windy conditions, the telescope may become slightly unstable.Overall, the Celestron 130SLT Computerized Telescope is an excellent choice for anyone looking to dive into astronomy without the complexity of more advanced telescopes. It¡¯s easy to use, offers great views of the Moon, Jupiter, Saturn, and a wide variety of deep-sky objects, and is portable enough to take with you on stargazing adventures. With its impressive performance, simple setup, and fun-to-use features, it¡¯s a fantastic value for anyone interested in exploring the wonders of the night sky. Whether you’re observing planets, star clusters, or galaxies, the 130SLT is a great way to start your astronomical journey.
Book Davies –
Box arrived in perfect shape. Once unpacked and put together, everything works like it should. No complaints at all. Be careful with the dovetail, it’s fixed directly to the tube, no rings. That will be the first upgrade. 6.5inch rings and a longer vixen style rail.Follow the instructions, it’s easy.
Jimmy cook –
Great telescope for the price. Is a little shaky but I ordered the Celestron anti vibration pads and is smooth. Very happy with the telescope.
RWS5674 –
Be sure you understand how telescopes work when purchasing.
Melissa Doering –
We¡¯ve had this about six months now and it¡¯s still amazing. The motorized base is so helpful when tracking the planets through the night sky and using the built is Star Finder